Showing posts with label bracelet. Show all posts

Tuesday, 23 December 2014

Show Your Unique Taste in the Wearing Of Handmade Jewelry

Jewelry has the unique peculiarity of having been created with the distinct purpose of adorning the body. Yes, there are items which have dual purposes, like watches (and medical or military identification tags), and there are items like belts and buckles which would technically be known as accessories, but items of jewelry are there expressly to be enjoyed for their decorative properties. Also, the more ornate such a piece of jewelry is, the more it can be seen as a symbol of the wearer's wealth or status.

Faster is not always better

It is no wonder that people throughout the ages have been prepared to spend large amounts of money on items of jewelry that are unique. The problem, however, arises with the mass manufacturing of jewelry by using machinery to expedite the process. The result of such a process is objects of jewelry which, although still expensive because of the materials that have been used, like gold and silver set with precious gemstones, are no longer one of a kind. Why would anyone be prepared to pay top dollar prices for items which they might see adorning the hands or necks of someone else as well?

Where did it all begin?

Traditionally, all jewelry was handmade. The earliest adornments were made from shells or stones and pieces of bark. Later, as people became skilled at creating their own beads, these were extensively used as ornamentations for necks and arms. In time the craft of jewelry making was usually undertaken by gold or silver smiths, who often gained their expertise at the hands of a father or other kinsman who was skilled at this occupation and would pass on many of his 'trade secrets' to be kept and passed on in the family.
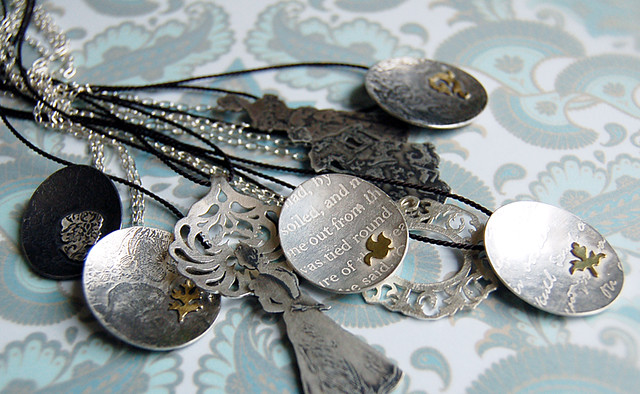
Handmade says 'Made with Care'

The most exciting thing about handmade jewelry is that it is unique. No craftsman worth his salt is going to turn out pieces that are the same. For this reason then, one is prepared to spend more. In addition, these distinctive items are generally more hard-wearing than those that are mass produced. A jeweler who makes items of jewelry individually is one who loves his craft and this devotion will be evident each piece. If you purchase handmade jewelry you will almost always be getting better quality items than those you buy over the counter. You might also be supporting the work of an emerging artist, and who knows, the piece you buy may become very valuable as that artist gains popularity.
Where Can You Find Handmade Jewelry at Reasonable Prices
? Misi.co.uk! Anyone who has a desire to own beautiful adornments for themselves or for others can shop at Misi.

Monday, 24 February 2014

5 Ways to Make Friendship Bracelets


Friendship bracelets are back and bigger than ever, and here are a whole stack of cool bracelets to make with string, thread, cord, or rope.All you need is some string, some time, and a few great bracelet ideas to make your own homemade wristwear.


1. Friendship Bracelets, All Grown Up


It’s the same technique practiced by summer campers everywhere. But when fashioned in sophisticated colors and luxurious strings and yarns with metallic accents, these knotted bracelets become great adult accessories. Read more


2. Braided Bead Bracelet


After playing with some materials that were already on hand, we’ve created a tutorial for a braided bead bracelet, which is a not so distant cousin of the hex nut and wrap bracelet. Because honestly, you can never have too many… Read more


3. Fun Fringe Bracelet
This bracelet mixes leather, linen and beads into a sweet summery design. Make a longer, necklace-length project by increasing the length of your cording and the number of beads you use. Read more


4. Leather and Yarn Bracelet


These bracelets are super easy to make.  You could make them longer, as well, to wrap around the wearer's wrist multiple times.  It closes easily with yarn through a loop in the bracelet that's low profile enough that it won't irritate the wrist.  Read more


5. Rhinestone Cowgirl


We can’t talk about rhinestones without talking about stylish cowgirls, can we? Read more


Happy Crafting!

Wednesday, 22 January 2014

DIY Heart Bracelet for Valentine's Day

As the month of love approaches, we thought we’d combine friendship and hearts into one Valentine’s Day themed tutorial: a heart patterned friendship bracelet! Using some candy-colored embroidery floss and your familiarity with the chevron friendship bracelet, you’ll be able to whip up one of these tokens of love in a heartbeat.

You’ll need:

  • 2 colors of embroidery floss
  • scissors
  • tape or clipboard

Creating a heart pattern involves just a simple modification to the chevron patterned friendship bracelet. Start by cutting 4 strands of each color, at about 24 inches each, for a total of 8 strands. Alternate the thread colors before tying them together in a knot. Remember to leave at least 3 inches of slack. Tape the knot to a flat working surface or clip onto a clipboard.
Separate the threads into 2 sets, 2 of each color on each side. Arrange the strands in an alternating, mirror-image pattern with the outside threads matching and so on moving inwards.
Start on the left side with the outermost strand (shown here in red) and make a forward knot by creating a 4-shape over the 2nd strand (shown here in blue), loop it under and back through the opening.
Pull up and to the right to tighten. Make the same knot twice everytime.
Continue knotting over each color, towards the right, until the outermost color has carried over to the middle. This is one half of the chevron pattern.
Pick up the outermost strand on the right side (show here in red) and make a backward knot, creating a reverse 4-shape over the 2nd to last strand (shown here in blue), loop it under and back through the opening. Pull up and to the left to tighten. Don’t forget to knot twice!
Continue knotting towards the left until the outermost strand reaches the middle. Tie a backwards knot with the two middle strands to connect the two halves. Don’t forget to always knot twice!
Continue onto a second row using the same method. Two normal, chevron rows are complete. Now, it’s time for a “special” row: take the 2nd outermost strand (shown here in blue) and make a backwards knot over the outermost strand (shown here in red). Knot twice.
Repeat on the other side: take the 2nd to last strand (shown here in blue) and make a forward knot over the outermost strand (showin here in red). Knot twice.
Complete the row by taking the 2nd outermost strand (shown here in red) and make forward knots over each strand until it reaches the middle.
Mirror the steps on the other side and connect the middle strands. The heart cleavage has been created and the third row is finished.
Now repeat this special row again for the 4th row, taking the 2nd outermost strand and reversing the knot over the outermost strand.
Mirror the step on the other side. This forms the outer edge of the heart. Now fill in the heart by finishing the row with 2nd outermost strand (shown here in blue) and making forward knots over each strand until it reaches the middle.
Mirror the steps on the other side and connect the middle strands. Now, it’s back to a normal row again to close the heart. Make forward knots with the outermost strands, moving inwards towards the middle. Connect the middle strands.
Knot another normal row and then 2 special rows to form another heart. Do you see the pattern? 2 normal, 2 special, 2 normal, 2 special . . . keep going until the bracelet is long enough to fit around the wrist.
Finish the bracelet with a big knot and trim the ends.
Voila! Heart patterned friendship bracelets done.
Happy heart day!

Source: Honestlywtf

Tuesday, 15 October 2013

Handmade Bracelets

It will surprise no one that at summer camp my favorite activity was always and without fail arts and crafts! I wasn’t great at archery or rowing, but I could make a lanyard like nobody’s business. I loved that camp craft projects were simple and fun to make, with no fussy equipment required. My summer days were happily filled with the satisfaction of gods-eyes, reed baskets and of course, friendship bracelets!
I’ve talked about my love for friendship bracelets here before, and we have created versions in cotton, wool, and even cashmere. This time I kept the colorful essence of a traditional macramed friendship bracelet but used a completely different (and much easier) technique to create a new kind of bangle: a craft-hybrid of friendship bracelets, rope tying, and lanyards! 
To create these little beauties I used our thickest Chinese Knotting Cord which comes in a vibrant rainbow of colors, and I finished them with a neat and effortless sliding closure. The resulting bracelet is so pretty and best of all, it perfectly captures the spirit of summer camp!

The Materials


To make several bracelets:
  • 4 spools of 1.4mm Chinese Knotting Cord in Grey, Aqua Marine, Neon Pink, and Navy
You will also need scissors and a lighter.

Cutting

These bracelets can be made in three lengths: to wrap around your wrist once, twice, or three times. For a one-wrap bracelet cut the cords to 19 inches; for two wraps cut them to 27 inches; and for three wraps cut them to 35 inches.

Starting and Finishing All Bracelets 

To start, tie all of your cords in a simple overhand knot 5 inches from the end, and tape the knotted end down to a flat surface.
To make the body of the bracelet follow the desired braid pattern (see below). For a one-wrap bracelet make the braided section 7 inches. For a two-wrap bracelet make the braided section 14 inches. And for a three-wrap bracelet make the braided section 21 inches. 

At the end of the braided section use an outer-edge cord to tie a simple overhand knot tightly twice around all of the other cord strands.

Snip off all of the strands (except for the one you used to tie the knots) very close to the knots. 
In a well-ventilated room burn the ends of these snipped strands with a lighter until they melt together and are secured. Untie the knot at the beginning of the bracelet. Use an outer-edge cord to tie a simple overhand knot tightly twice around all of the other cord strands, just as you did for the end of the bracelet. Snip off all the cords except the one you used to tie the knots and burn the beginning just as you did the end.

You will have a 5-inch tail coming from each end of the bracelet.
Make sure the bracelet isn't twisted and tie the left-hand tail in a double knot around the right-hand tail 1 3/4 inches from end of the braided section. Snip off the left-hand tail and burn the tail and the knot wraps together to secure the knot.

Repeat for the right-hand end. Your bracelet will now be complete with a closure that slides open and shut by pulling on both knots.

Doubled Basic Braid


This is the easiest of the braids!
Cut six strands, two in each color, to the correct length.
Put one same colored pair to the left, one to the center, and one to the right.
Pull the left-hand pair over the center pair so that it becomes the center pair. Keep the pairs of thread flat, one strand next to the other, making sure they don't get twisted as you go. This way the bracelet will lay flat when you are done.
Pull the right-hand pair over the center pair so that it becomes the center pair.

Keep braiding in this manner until you reach the desired length, then finish the bracelet.

Single and Double Five-Strand Braid 


Below are photo instructions for making a single five-strand braid. To make a double five-strand braid you will need to cut five pairs of cording and treat each pair as one strand. Just as for the doubled basic braid, you need to make sure that the pairs lay flat and don't twist as you go so that the bracelet will lay flat.

Cut five strands of cording to the correct length.
Arrange the strands so there are three on the left side and two on the right side. You will always be working towards the center.
From the left side, pull the outermost strand towards the center, traveling under its neighbor and over the next adjacent strand. 
Repeat from the right, pulling the rightmost strand under its neighbor and over the next adjacent strand towards the center.

Slowly a pattern will start to emerge. This braid, as well as the seven-strand braid, are a little hard to make look nice at the beginning, but that's okay. Just braid a little further than your desired length, and when you undo the beginning knot, you can take out the messier beginning section before you finish that end.

Keep braiding in this manner until you reach the desired length, then finish the bracelet.

Five-Strand Dovetail


You can make a dovetail braid with any odd number of strands, but with cording this wide more than five can start to look a little messy.

Cut five strands of cording.
Arrange them so you have three on the left and two on the right.

From the left side pull the leftmost strand over the two adjacent strands, making it the new middle strand.

From the right side pull the rightmost strand over the two adjacent strands, making it the new middle strand.

Repeat from the left.

And from the right again.

Keep braiding in this manner until you reach the desired length.

Seven-Strand Braid


This braid is made in much the same manner as the five strand braid.
Cut seven strands of cording.
Arrange them so you have four on the left side and three on the right side.

Working towards the center pull the leftmost strand under its neighbor and over the next adjacent strand and then under the following one.

Repeat for this right side: pull the rightmost strand towards the center, under its neighbor and over the next adjacent strand and then under the following one. 
Keep braiding in this manner until you reach the desired length and then finish the bracelet.