Showing posts with label food. Show all posts

Friday, 21 March 2014

DIY ~ Cupcake Crumble in a Jar

cupcake crumble
Cupcake Crumble
The latest kitchen trend? Cupcakes in a jar! Or so it was said. I love it! And then I had to think about it. Cupcakes in a jar? Sounds fun. Sounds simple. But as I started to ponder this foodie phenomenon,  I began to have more questions than answers…

How do you get the cupcake in the jar? Do you bake the batter in the jar? Will the jar hold up to the heat in the oven? Do you bake the cupcakes separately and then place them in the jars? How do I get the cupcake out to eat it? How long can these cupcakes last? Do I need a big jar or a small jar? Where do I find a small cupcake-sized jar anyways?

..And then I decided to stop thinking and start playing. I liked the idea of “cupcake in a jar” but I wanted to put my own spin on it – the result is my Cupcake Crumble in a Jar. With this recipe, leftover cupcakes get an instant dessert makeover. It’s a cupcake-lovers go-to recipe for “in a jar” fun..
Leftover Cupcakes Get a Makeover.
leftover vegan cupcakes
Leftover vegan cupcakes needed a facelift.
Cupcake Crumble in a Jar
If you love cupcakes, and really who doesn’t, you probably bake them by the dozen, share the freshly made delights, keep them for a day or two and then the fun is over. But sometimes you end up with two or more cupcakes a day later and since cupcakes can dry out rather quickly – you are faced with a terrible predicament: do I toss these cutie cupcakes?? Now you don’t even have to let that thought cross your mind because you can easily whip up my Cupcake crumble in a jar to refresh and moisten leftover cupcakes.
Cupcake Crumble in a Jar
Here is what you will need:
* 2 or more leftover cupcakes – pop off the frosted flat tops (set aside) and crumble up the cake bottoms
* whip up your favorite vanilla or chocolate (or both) pudding
* a clean medium sized glass jar with lid – not too tall (I used a short and stout roasted red pepper jar)
* optional additional crumble ingredients (fudge sauce, nuts, marshmallow creme, canned fruit, berries and more)

layering the crumble
How To:
Now you start layering.
First add some pudding.
Then the cupcake crumbled bits.
Then another layer of pudding.
Then one of the frosted cupcake flat tops.
Then more pudding.
More crumbles.
(Add additional ingredients along the way if you’d like)
Last layer is one of the frosted cupcake flat tops.
Close the jar lid and chill in the fridge for a while before serving. This way the pudding will help moisten the crumbles.
Serve by spooning into dessert cups.

lid on cupcake
lid on.
Cupcake Crumble in a Jar
There! You just turned your leftover cupcakes into a snazzy new dessert treat – fit to please those “cupcake in a jar” enthusiasts!
Thursday, 27 February 2014

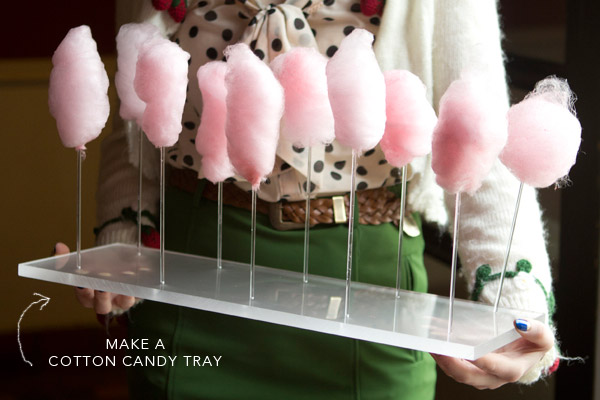
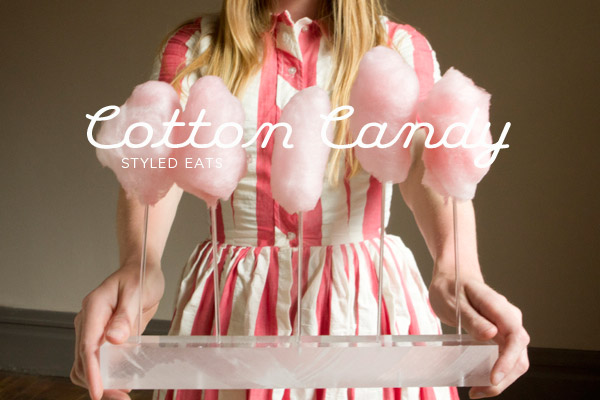
DIY ~ Styles Eats: Acrylic Trays

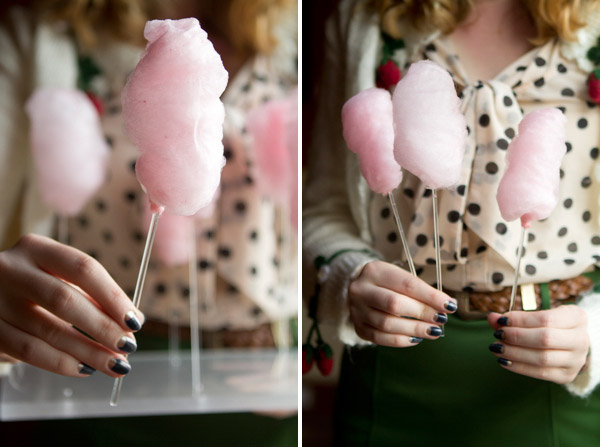
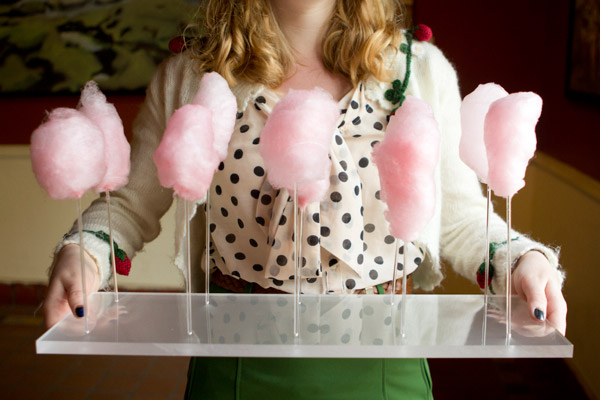
A lot of caterers use acrylic trays as a way to present food. It is a really clean and modern way to serve food to your guests. This project shows you how to make your own tray. We’ve done it here for cotton candy but you could use it for just about anything on a stick. It is really simple, all you need is to be able to drill a few holes. I think these would be great for a cocktail party or baby shower, or making an awesome Amy Atlas style dessert table. I also really like that you would be able to reuse these over and over for future parties!


Full instructions after the jump…
To make the cotton candy you can rent a cotton candy machine. We decided to buy one of these at-home-machines for $40. I was pretty pleased with the results. They work great for small parties but if I had to produce a lot for a school class or large group I would still rent a large machine from a party supply store. (Tip: we found we had better luck spinning the cotton candy on a wood stick rather than acrylic so we transferred them over to the acrylic sticks afterwards.)

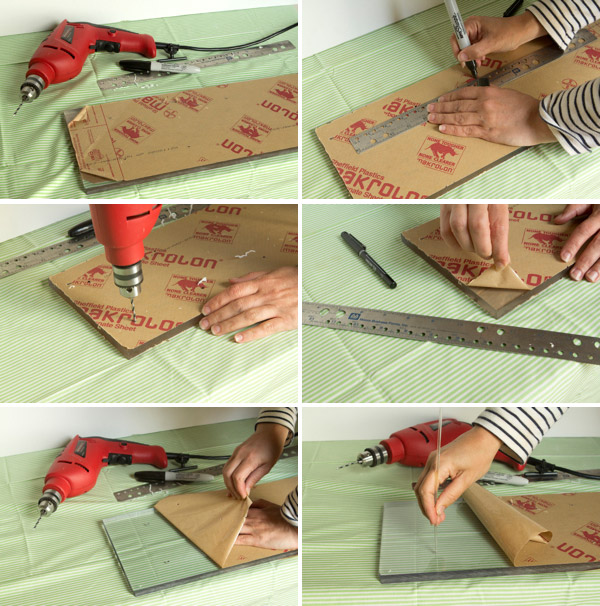
Materials Needed: Thick acrylic slab, 1/8″ drill bit for plastic, 1/8″ acrylic sticks.

To make acrylic trays like this cost effective, the key is to hit the remnant bin at an industrial plastic store. Here in San Francisco we have TAP Plastics. They have large thick slabs in various colors and thicknesses for about $10. (If you don’t go the route of the remnant bin they can cost from $30-$50!) In addition we picked up 1/8″ thick acrylic sticks that we cut down to the size we wanted–about 7″ long. We also purchased a $5 drill bit in 1/8″ that was specifically designed to drill through plastic. All the supplies for the tray came out to about $20 and every tray after will cost about $10.


Step 1: Figure out how big you will make your cotton candy and decide how far apart you want your holes. Mark the liner on top of the slab where you are going to drill your holes.

Step 2: Using your drill bit for plastic make a hole 2/3 of the way through the slab. Check if the stick fits, if it doesn’t work the drill in the hole to widen it until it fits.

Step 3:  Peel back the liner and voila! You’ve got a tray for your party!


Tuesday, 11 February 2014

Valentine's Day: 3 Days ~ Romantic Menu for Two


Skip the crowded restaurant this year, and make your own cozy Valentine's Day dinner at home. 

This menu makes clever use of readily available ingredients: 

Wonton wrappers stand in for homemade pasta, and a whole chicken is used not just for the main course but also for the pasta filling and a flavorful stock. The spinach is ready in minutes. 
For dessert, whip up individual Pavlovas, cloudlike meringues tinted raspberry pink and topped with berry curd and cream.


1. Appetizer: Stuffed-Noodle Soup


This recipe makes four ravioli, but you can serve the soup with one or two in each bowl. If you don't have time to make the stock and ravioli, substitute 4 cups low-sodium store-bought chicken stock and fresh ravioli and start at step 8. Read more


2. Main: Radicchio and Mushroom Chicken Roulade


If you aren't using a whole chicken for the Stuffed-Noodle Soup or if you are serving the roulade without the soup, you can use two boneless, skinless chicken breast halves and low-sodium store-bought chicken stock. Ask your butcher for a chicken liver. Read more


3. Side: Simple Steamed Spinach


This simple side dish works well alongside Radicchio and Mushroom Roulade. Read more


4. Dessert: Raspberry-Cream Pavlovas


This dessert is perfect for a pair or for a dinner party. Unfilled Pavlovas can be stored in an airtight container at room temperature up to two days, and any leftovers can be assembled just before serving. Raspberry curd will keep for up to a day in the refrigerator. Read more


Bon Appetit!

Thursday, 6 February 2014

Valentine's Day: 8 Days ~ Cute Valentine's Breakfast Recipes


Show your loved ones how much you care by starting their day with these tasty recipes. From heart shaped cranberry muffins to sweetheart cinammon rolls , these recipes are a great option for breakfast in bed, or something to surprise the kids with in the morning.


1. Cranberry Applesauce Muffins


Whether you have a special someone, children who love cute food, or just want to treat yourself this Valentine’s Day, these muffins are the perfect breakfast treat. Read more


2. Ham and Egg Crepe Squares


Breakfast never looked so elegant. These crepes are lined with Black Forest ham, with a sunny-side-up egg peeking out of each. Read more


3. Heart Shaped Eggs


This breakfast takes just about 20 minutes to prepare, so it is fast enough to fix for the kids before heading out the door to work or school! Basically this breakfast is all about cooking eggs in a heart shaped muffin tin. Read more


4. Heart Bread with Cheese & Nutella


This is a super sweet and kindhearted breakfast-in-bed grilled cheese that will make your lovie super excited! Read more


5. Cranberry Sweetheart Scones


Their light texture and fruity flavor make these heart-shaped scones a treat for your sweetie. Read more


6. Sweetheart Cinnamon Rolls


A sweetheart of a treat for Valentine’s Day! Make these heart-shaped cinnamon rolls for your sweeties in just 25 minutes. Read more


Happy Valentine's Day!

Monday, 27 January 2014

Valentine's Day: 18 Days ~ 5 DIY Treats with Hearts


Valentine’s Day is just around the corner, and who doesn’t love giving and receiving handmade treats with hearts to celebrate the special day?  Whether you have oodles of free time on your hands or non at all, there are Valentine’s treats  that will fit into your schedule and your stomach!


1. Chocolate Valentine's Suckers


Load the sucker molds with sucker sticks. Squeeze the chocolate over the tip of the stick first and into the whole of the mold and chill in the refrigerator for 10 minutes or so. The heart lollipops are ready! Read more


2. Flying Heart Cupcakes


Bake your heart cupcakes with a marble between the liner and pan to create this shape. Beautiful idea, isn't it? Read more


3. Conversation Heart Cookies


Once iced, these cookies need to dry completely overnight before being stamped with a message for your sweetheart. Read more


4. You Make My Heart Sing Cake


Make your loved ones’ hearts beat quicker and grow fonder when they taste these delicious creations made with love and care by YOU. Read more


5. Sweetheart Pops


Sweet creations that kiddos will certainly need help with, these sweetheart pops are fun and tasty treats. Read more


And if you don't feel crafty, check out our Food & Sweets Category!

Friday, 29 November 2013

Christmas Countdown: 25 Days ~ How to make a Gingerbread House


Any baking novice can tackle a gingerbread house. While the kits from the store are convenient, making your own may be easier than you think. Plus you can make it with your kids.

This gingerbread house is delicious and a lot of fun, too. Just follow the step-by-step process in this video and of course use your imagination!

Gingerbread House Tutorial


Download the Gingerbread house template to make your own here


Three More Gingerbread House Ideas

1. House on a dessert table 

2. Bite-sized Gingerbread House 

3. Crackers Gingerbread House 
source: cakedalaska.com

Happy Holidays!

Monday, 17 June 2013

Apricot Jam Recipe

A delicious Apricot Jam Recipe made with fresh apricots to bring summer sunshine to the table year-round. 

Prep Time: 45 minutes 

Cook Time: 1 hour, 00 minutes 

Ingredients:

  • 2¼lbs/1 kilo fresh apricots, halved and stoned - keep the stones
  • 2¼/1 kilo sugar
  • 1 pint/ 500ml water

Preparation:

  • Cut the apricots in half and remove the stone.
  • Break a number of the stones, remove the almond, wash, dry, and keep to one side. You will need roughly 8 for each pound/450g of jam.
  • Place the sugar in a jam pan with the water and heat slowly to a gentle boil.
  • Drop the fruit into the syrup, bring to a fast boil then immediately remove the fruit and keep to one side.
  • Boil the syrup a second time as in stage 2.
  • Replace the fruit into the syrup and bring back to the boil. Cook for 15 mins.
  • Remove the fruit again, this time place into clean, warm jam jars. Add 2 almonds to each jar; the almonds add extra flavor to the jam.
  • Boil the syrup a third time then pour over the apricots in the jars. Cover with a tight fitting lid and allow to cool. The jam can be stored unopened for several months in a cool place. Once opened store in the refrigerator.
Good Luck! 

Thursday, 20 September 2012

National Cupcake Week

So to celebrate National Cupcake Week I had a little browse through MISI to find a few Cupcake Inspired Items. 
Oh my!  There are sooooo many gorgeous cupcake themed items on MISI that I've struggled to keep this post fairly short!!


Happy National Cupcake Week!
xx