Tuesday, 11 March 2014

Mother's Day Crafts Kids Can Make

Kids will make mom feel special with any of these creative craft ideas for Mother's Day.

Butterflies from the Sole
Mom will love seeing her child's little feet frozen in time with this cute craft. Precious footprints are transformed into a beautiful butterfly.


Mom's Memory Box
Create a box full of memories for your mother this Mother's Day. Decorate a box with photos and beads, and fill it with special family memorabilia, such as drawings, letters, and photos.


Button Picture Frame
Have fun decorating a picture frame with buttons to show off a photo of one of your mom's favorite people -- you!


Mother's Day Flower Pots
Decorate flower pots with your own special artwork. Then, fill them with seeds or a plant to show mom just how much your love grows for her.


Flutterflies
These colorful butterflies are a perfect craft project for kids who need a gift for Mother's Day. Mom will love hanging this stained-glass piece of art in her window this spring.

Monday, 10 March 2014

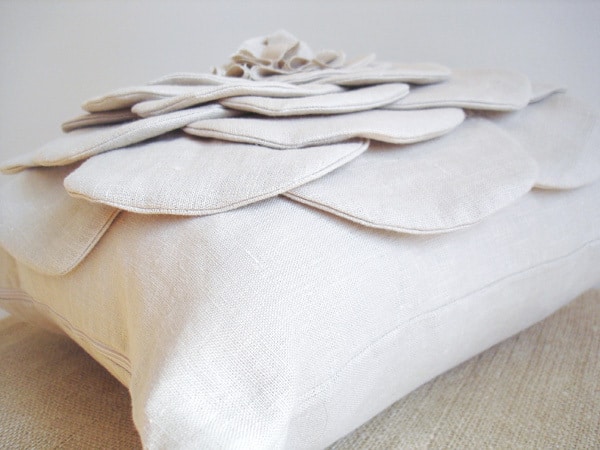
DIY ~ Flower Pillow For Mother's Day

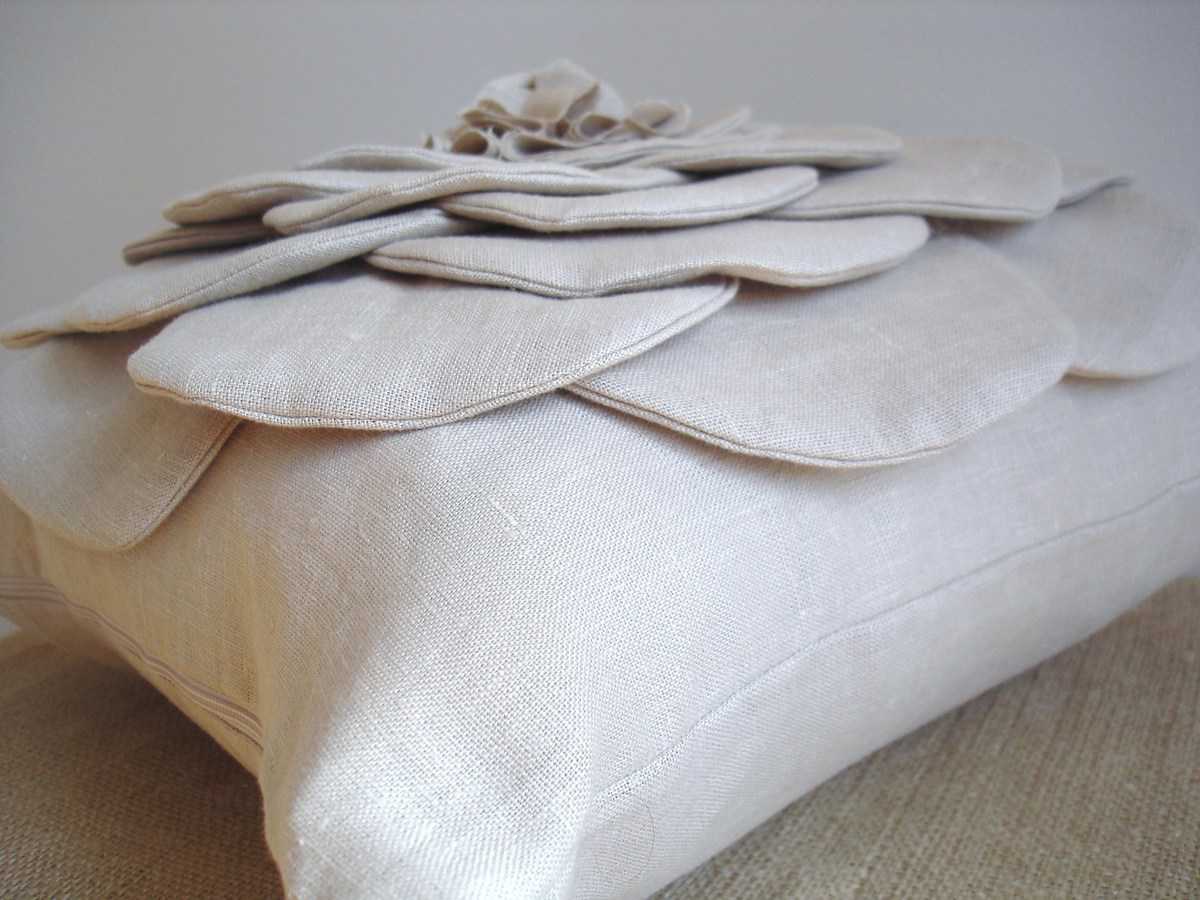
This is truly unique and unconventional way to give flowers to your mother!

DSC020351 shabby flower pillow (a tutorial)

Supplies Needed:

fabric (linen here)
sewing machine
zipper (if desired)

Step 1:

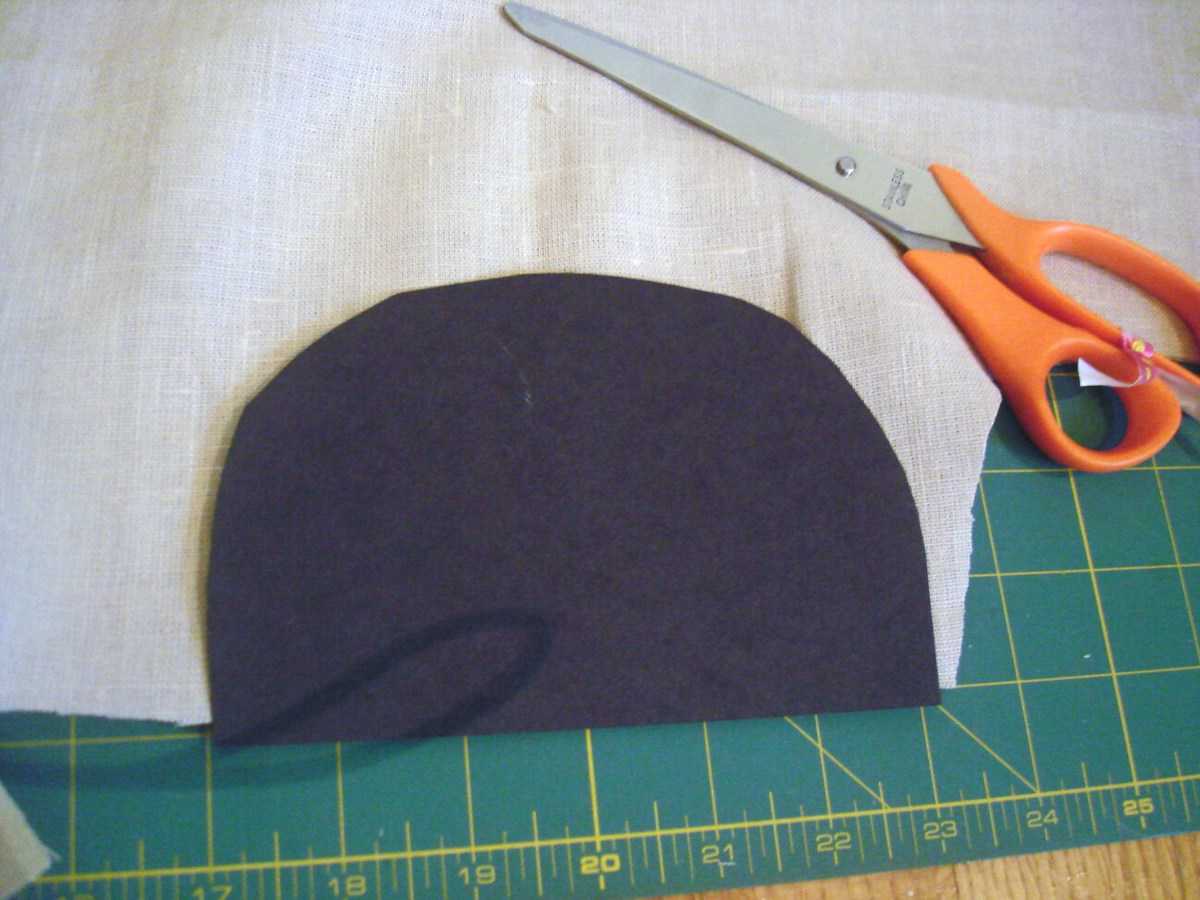
Create your “petals”. 
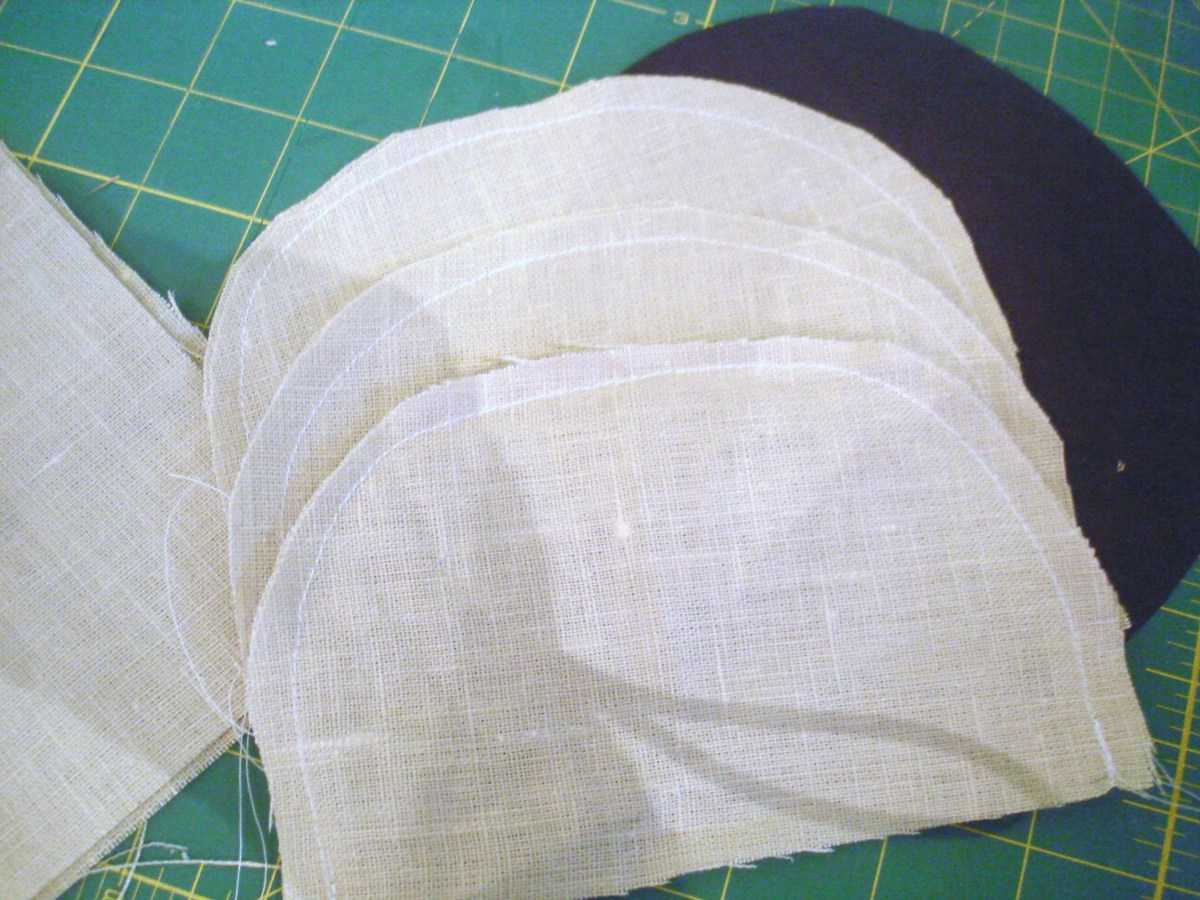
Cut out a half-circle template out of cardstock. Place on a double layer of fabric and cut. Take your two layers of fabric and stitch around the curve.

DSC01996 300x225 shabby flower pillow (a tutorial)DSC01997 300x225 shabby flower pillow (a tutorial)
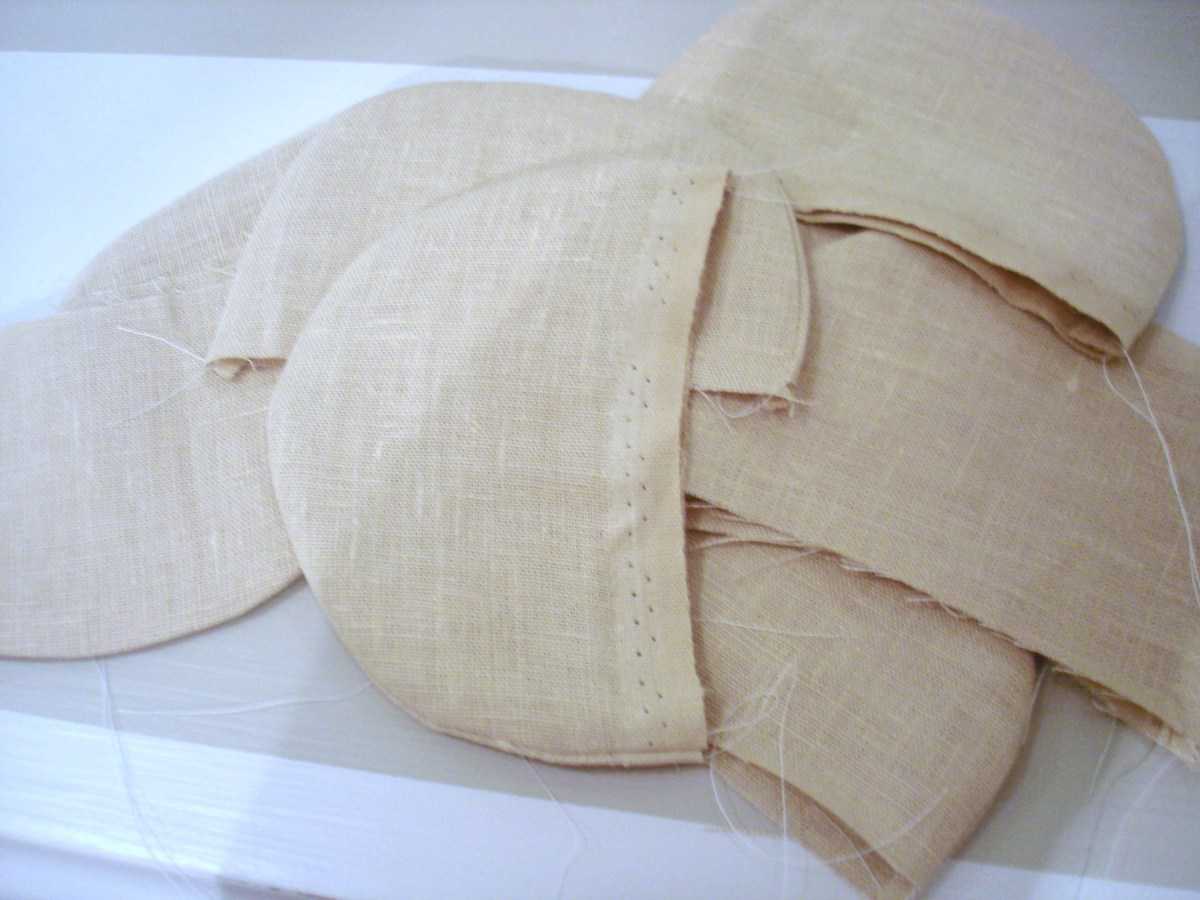
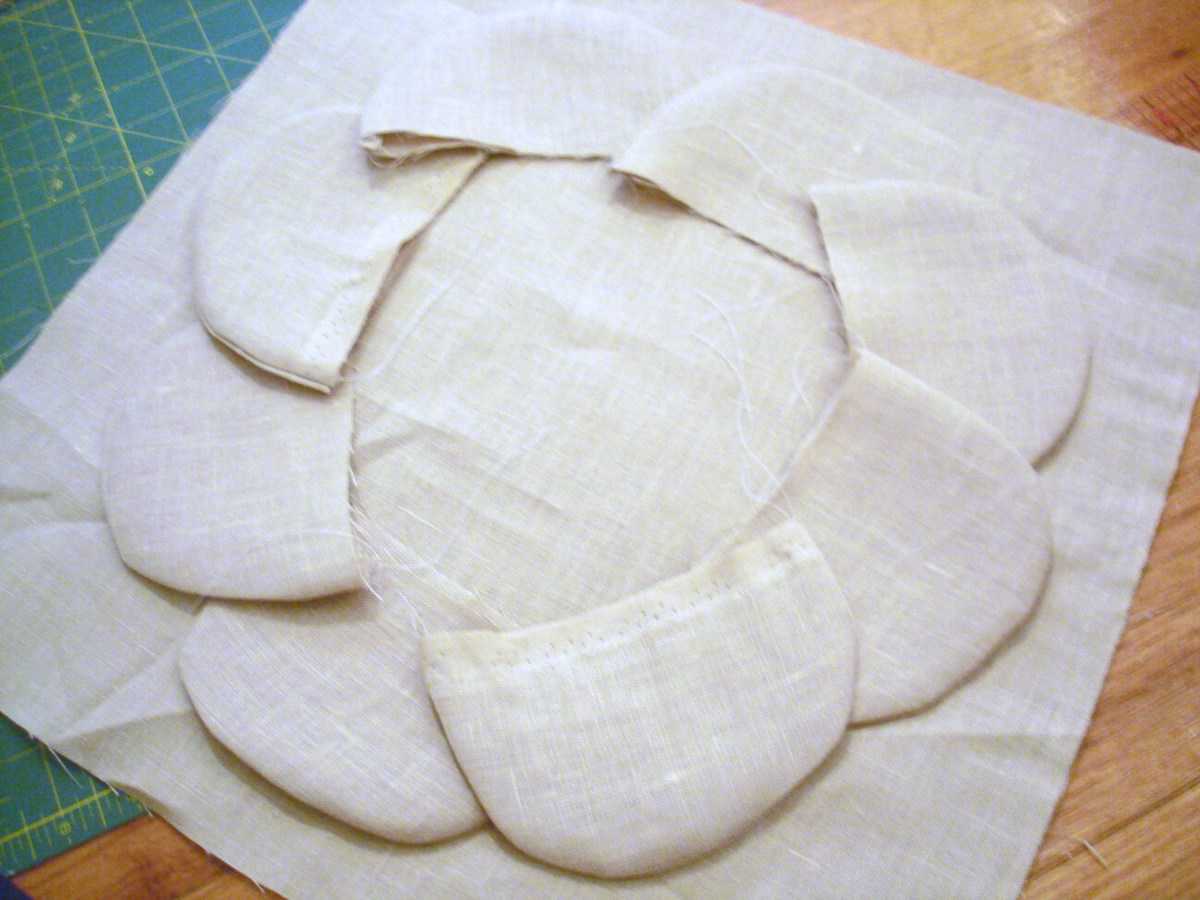
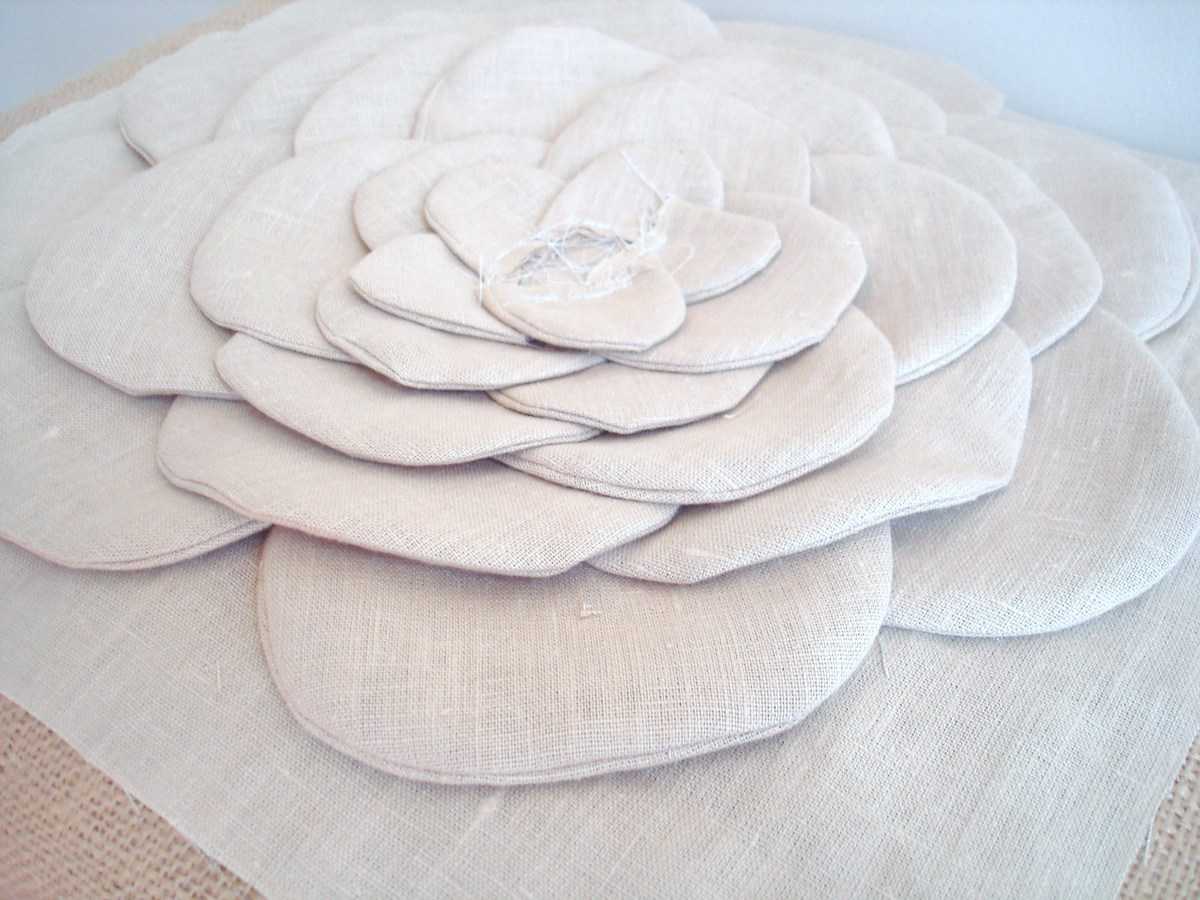
Step 2: Take sew petals and turn inside out. Press flat. Take petals and arrange your first layer on your pillow fabric.
DSC02000 300x225 shabby flower pillow (a tutorial)DSC02002 300x225 shabby flower pillow (a tutorial)
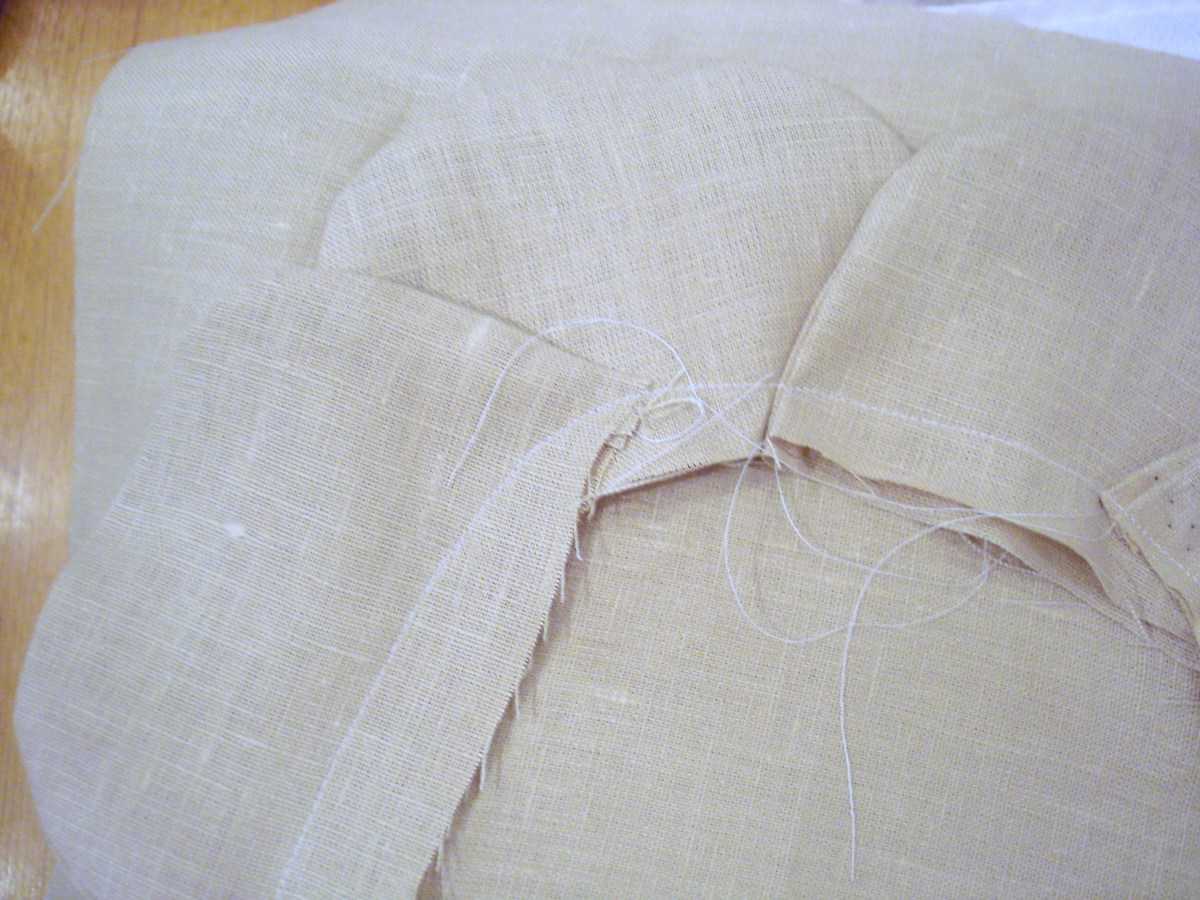
Step 3: Stitch petals down to fabric. Repeat for second layer of petals.
DSC02003 300x225 shabby flower pillow (a tutorial)DSC02004 300x225 shabby flower pillow (a tutorial)
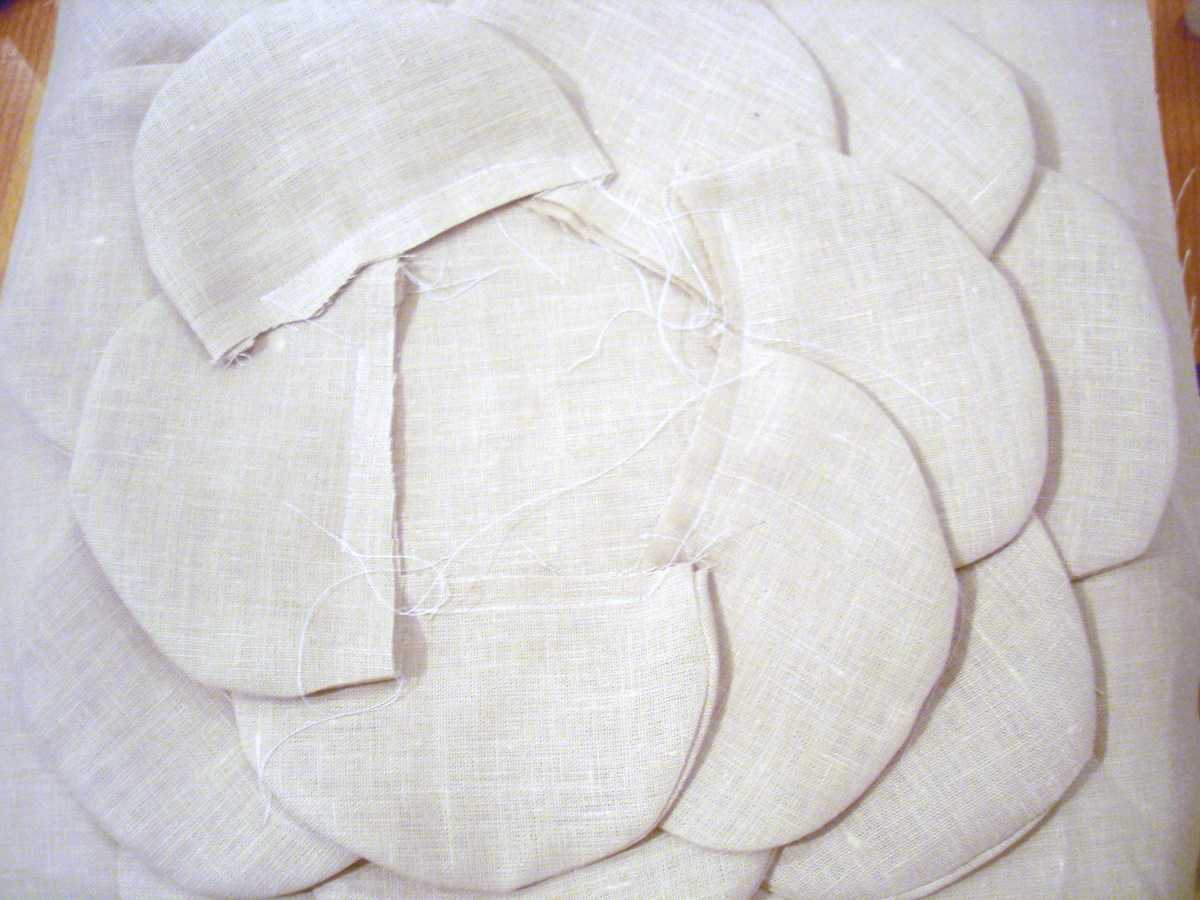
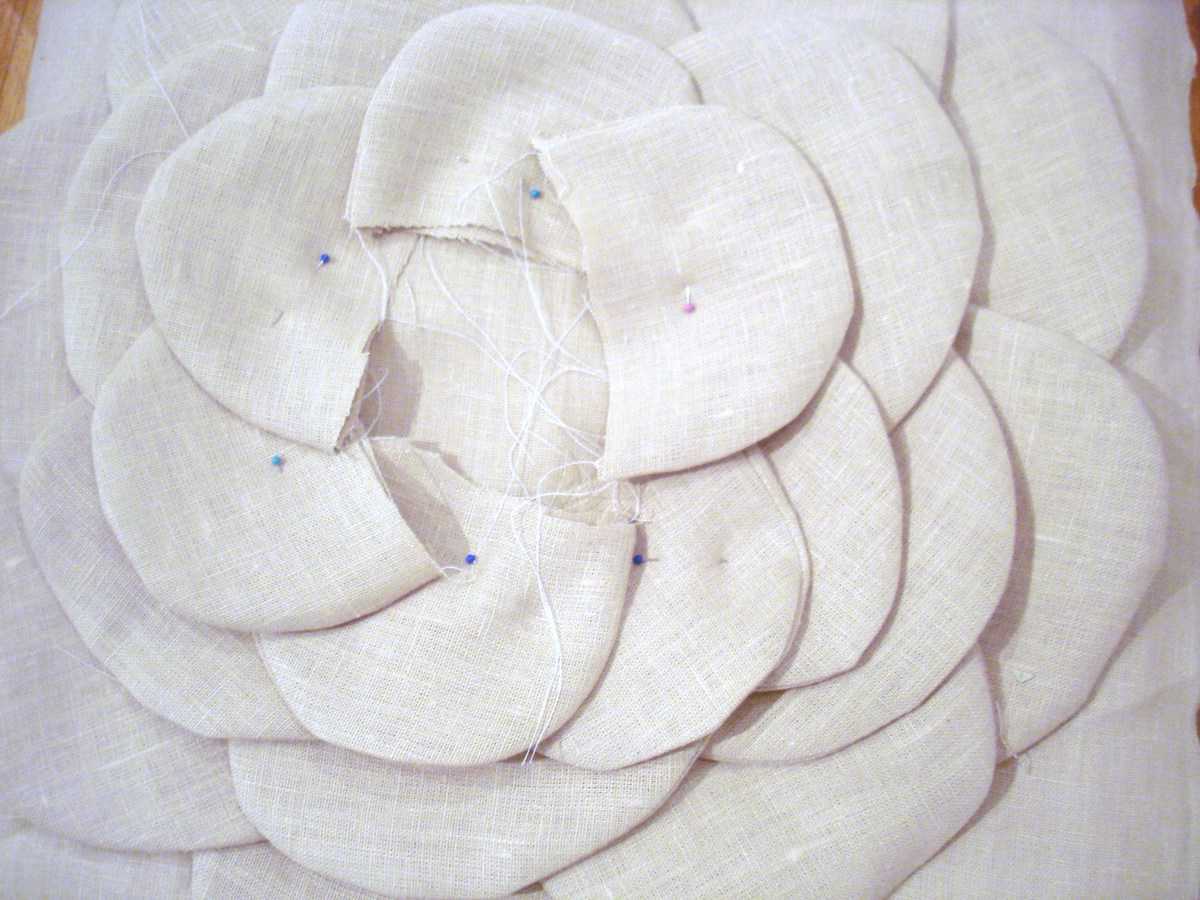
Step 4: Continue creating petals and attaching them to pillow front. Here we did 5 layers total, and, for layers 2-4, we cut down the template and made the petals slightly smaller. Then cut down the template further for the fifth and final layer.
DSC02011 300x225 shabby flower pillow (a tutorial)DSC02019 300x225 shabby flower pillow (a tutorial)
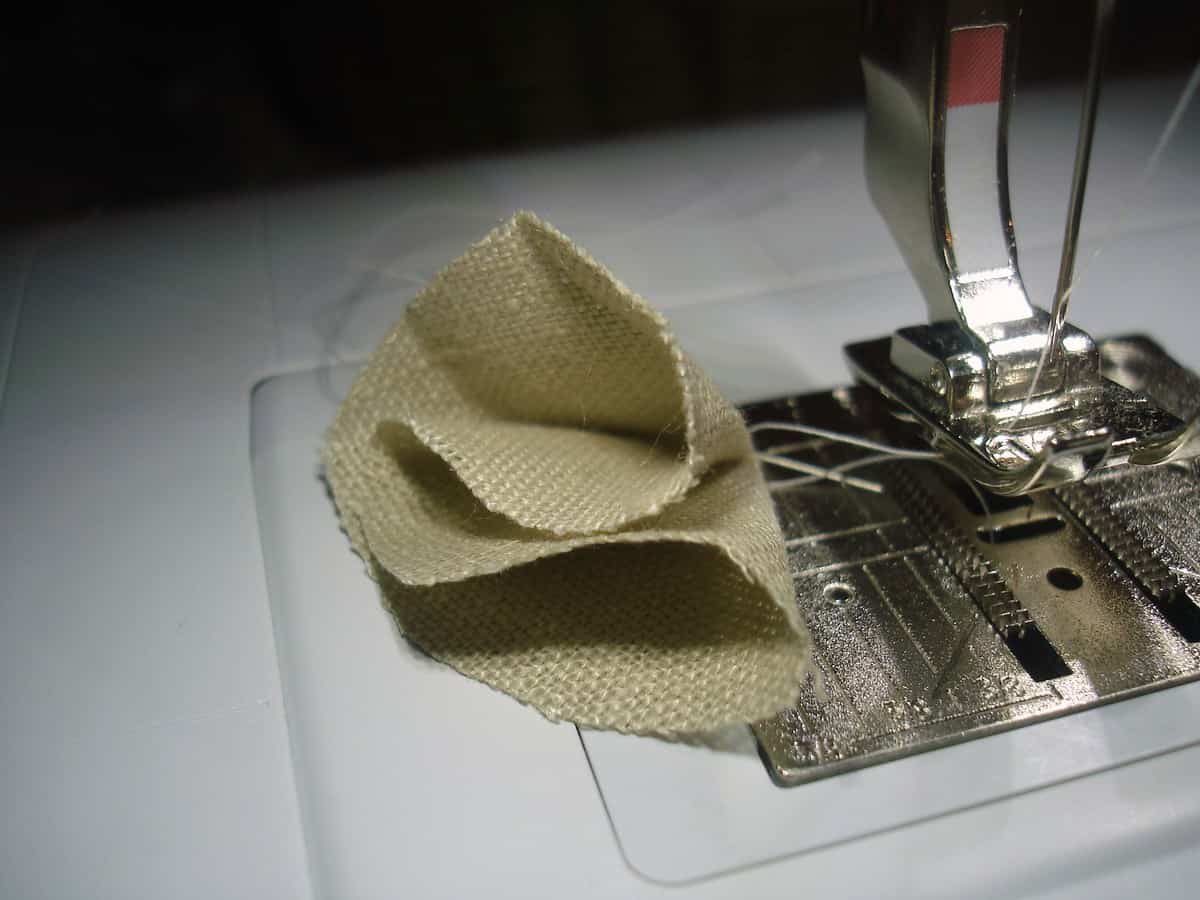
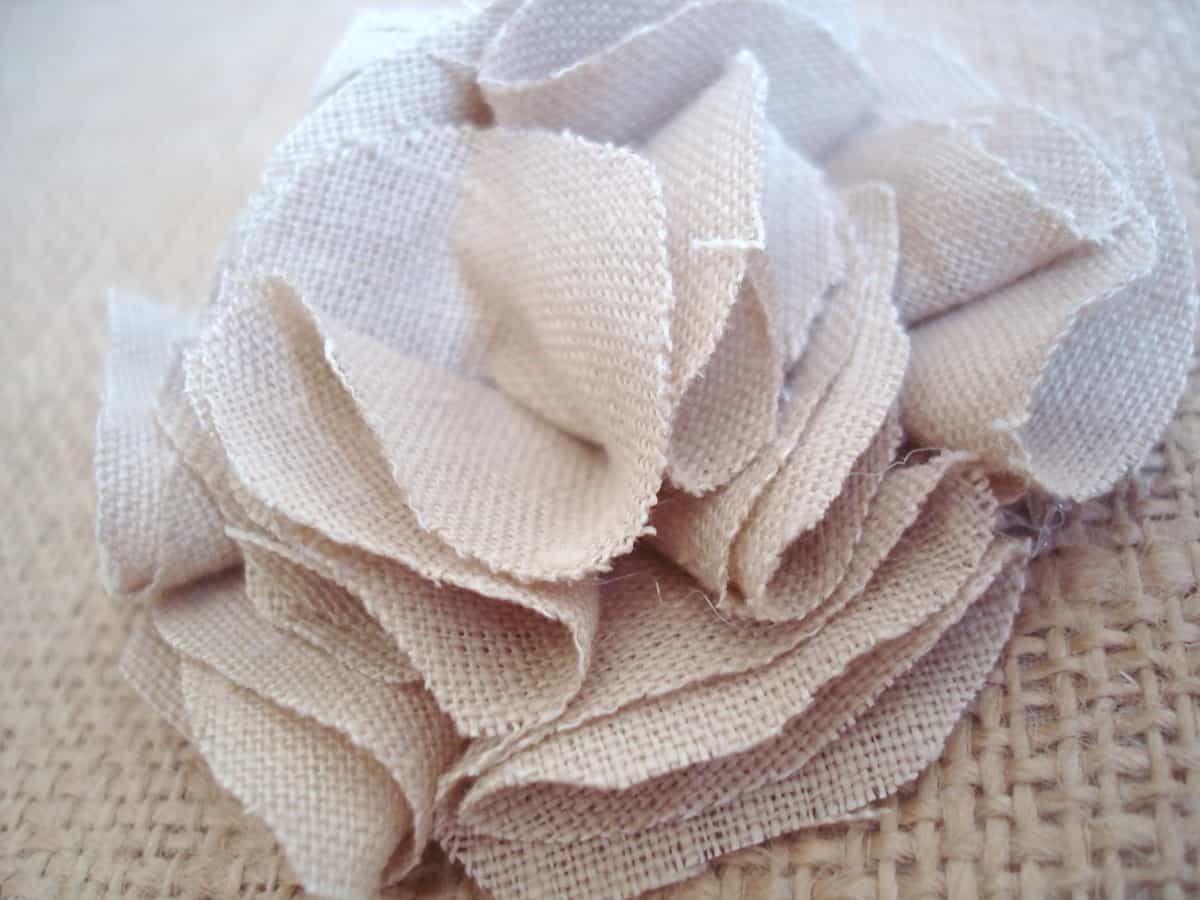
Step 5: Almost there! Now you are ready to create your flower’s center. We did this by taking small circles of fabric and folding them once (into a half circle) and again (folding them into a cone shape). Either hot glue or sew your petals shut. Take your petals and hot glue them into a circle onto a small piece of fabric. Once your outer circle is complete, continue layering and working into the center of the circle.
DSC02014 300x225 shabby flower pillow (a tutorial)DSC02020 300x225 shabby flower pillow (a tutorial)
Step 6: Glue or stitch your flower’s center onto your pillow fabric. Lastly, sew your pillow together in the method of your choice!

How to Link Facebook to Twitter

Linking your Facebook account with your Twitter account will make it even easier for you to share your thoughts with your friends and followers. If you want to know how to do it in just a few easy steps, follow these instructions.


  1. Link Facebook to Twitter Step 1.jpg
    1
    Go to this link.
  2. Link Facebook to Twitter Step 2.jpg
    2
    Click on "Link my Profile to Twitter."
  3. Link Facebook to Twitter Step 5.jpg
    3
    Click on "Authorize app." This will allow your Facebook account to post to your Twitter account.
  4. Link Facebook to Twitter Step 6.jpg
    4
    Make any necessary adjustments to your settings. You should be told that your Twitter is now linked to your Facebook profile. Right now, there will be checked boxes next to the following: status updates, photos, notes, videos, links, and events. If you'd like any of those to not be linked to your Twitter, then you can unclick them and select "Save changes."

Tuesday, 4 March 2014

How to go from Hobbyist to Professional in 9 easy steps

According to the Hobby Industry Association’s (HIA), there is at least one crafter in four out of five U.S. households, or about 70 million crafters total.  Their research says that about 14% of these 70 million crafters sell their wares, which is about 12 million people (Stats taken from A Brief History of the Crafts Industry). That is an awful lot of people who craft, and that’s just concerning the United States!  Most of these 12 million craft sellers started off as hobbyists…someone who just started crafting because they enjoyed doing it, they liked the outcome, the process calmed their spirits.  So, how did these crafters become professionals?


While they each have their own special and unique stories about how they sold their first product, the basic idea stays the same, and I want to share with you the 9 steps (in no particular order) that they each followed to go from a hobbyist to a professional.

 1. Have a craft.  Duh, right?  Well, you might think, but have you ever seen someone who has tried to sell on the idea of “I can make whatever you want”? The person who *can* make scrap book pages, but hasn’t put forth the time and effort to provide any proof of that concept.  It’s nice to offer your customers a chance to buy personalized products, to make sure that they get exactly what they want.  However, there is such a thing as offering too many options.  Letting people get an idea of the kinds of things that you can make, with examples and maybe one or two options is always the better road to travel.  As people start getting an idea of what is available as far as your personal skill-set, then they might, just maybe, possibly, start coming to you for special and unique requests.

2. Pick a niche.  While this might seem a bit of a drag to limit your crafting abilities, it really is a must for becoming a professional.  Knowing a little about a lot does not make you the expert that you need to be.  Pick one craft, maybe even one product, and eradicate every option, explore ever direction, know everything about that one thing.

3. Know your audience.  Often called the target audience, this is who you are selling to.  If you are making baby products, realize that you are selling to the parents of these babies, your audience is parents.  You have to know who you are selling to, so that you can know *how* to sell, and more importantly *what* to sell.  For instance, if your target audience is older people, you probably wont have a lot of luck selling on any online venue.  Likewise, if you are selling to high school students, I doubt you would find success with Backstreet Boys paraphernalia.  Know who you are selling to, figure out the best way to reach them, and then make sure that you are trying to sell the appropriate products.

4. Create a marketing plan.  Again, look back at who your target audience is.  Have a plan, with a set goal, on where you want your business to be in x amount of time.  Set forth a strategy to get there.  Look back every now and then to judge where you’ve come from, and re-adjust your goal as necessary.  Having a plan is definitely a must for the professional crafter.  It means that you aren’t just “look, I’m selling my hand-made crafts because I can, and if I’m still doing it in 3 months, then awesome!” Set long term, and short term goals, and re-evaluate on a regular basis.

5. Present yourself in a professional manner. Whether this is customer relations, or a public appearance, if you conduct yourself as a professional you will be treated and considered a professional.  Be polite, have manners, say yes sir, and no ma’am, no thank you, and please.  Dress the part, don’t be a slob, clean-cut, groomed, brush your teeth, and put on deodorant.  Not necessarily black-tie, but dress like you care about your appearance.  Stick with the deadlines.  Whether set by you or your customer, if *you* say a product is going to be done at a certain time, make sure that it is done!
6. Create Policies.  While not necessarily the most enjoyable part of selling crafts, it is still a must for a professional.  It is important for your customers to know how to deal with returns, or shipping issues, custom orders, or payment methods.  The hobbyist will be making up these policies on the fly, as the issues arise, oftentimes changing their ideas based on the situation.  Having a policy set in place *before* the situation is brought up by a customer and making sure that the customer knows what is going to be done about it can save a lot of hassle, and is definitely very professional and “think a headedness”  (yes, I just made that up).

7. Change your attitude.  Don’t just scratch your head and skip over this one.  You have to consider yourself and your little business a profession(al) before anyone else will. Look at it as an actual job.  Most likely, your little crafting DID start off as a hobby, something that you did in your spare time to de-stress or because you enjoyed it.  OR, maybe you are having trouble wrapping your head around the idea that you are CRAFTING as a job!  Well, you are doing just that, a *job*, and you need to look at it as such.

8. Be Competitive.  This one is all about pricing your products which is a very tricksy aspect to get right.  Don’t price your products so low that they come across as cheap quality, but don’t price them so high that you can’t effectively compete with other sellers (I can present a 93.48% guarantee that there will be other sellers of your niche).  I have been told that I price my products too low, but I *feel* like I price them too high, and I consider myself very fair.  I fit on the lower end of the average price for products of my niche and I am perfectly comfortable with that.

9. Manage your time efficiently.  You are the manager, the creator, the seller, the bookkeeper, the packager, the errand-runner, and the coffee-getter.  Maybe you didn’t want to have all of those rolls when you first signed up for this craft selling job, but the professional crafter DOES have all of those rolls.  Figure out how much of your available time can be spent on each aspect of your little business and don’t get distracted.  Remember, it is a *job*, treat it like so.

There are a ton of crafts that you can make and sell.  Do the research.  Find out what people will buy.  Sometimes you sell some items that you don’t necessarily like, but your customers do.  Take the time to figure everything out, know how you are going to sell, know who you are selling to, and know what you are going to sell to them.  Treat your crafting as an actual office-job, and be the professional that I know you can be!

Monday, 3 March 2014

How to Add Your Location on Twitter

Adding your location on Twitter will let your followers know where you're tweeting from, whether you're a homebody or permanently on the move. It's easy to do. Read on to learn how.


  1. Add Your Location on Twitter Step 1.jpg
    1
    Open your Twitter account and sign in.

  2. Add Your Location on Twitter Step 2.jpg
    2
    Look at the top right on the homescreen. You will see a toolbar with options. Select 'Settings'. Wait for the page to load completely.
  3. 3
    Navigate to "Account" tab

    Add Your Location on Twitter Step 3.jpg
  4. 4
    Tick the "add location to my tweets" box on the middle part of the screen.Save changes

    Add Your Location on Twitter Step 4.jpg

Thursday, 27 February 2014

Marketing Tips: 10 Do’s and Don’ts for Your B2B Pinterest Strategy

As we’ve discussed before, Pinterest can be an excellent platform for you to market your Misi Store and your beautiful creations in a unique way. However, sometimes, developing a good Pinterest strategy can be tough. To help on your endeavor, we’ve compiled a comprehensive list of 10 “Do’s” and “Don’ts” for your Pinterest marketing strategy.


1. DO use the 5+5+2 model in creating your first boards. If you haven’t started pinning yet, we have a simple formula to creating your first 12 boards:
  • Make 5 boards for things your audience loves.
  • Make 5 boards for things your audience has a hard time finding.
  • Make 2 boards centered on your company.
Add a few pins to each board, and voila! You now have a bouncing baby Pinterest account.

2. DO have awesome cover photos. Your boards’ cover photos are the first thing a user sees when they land on your page so you better make sure they’re pretty. I mean, you wouldn’t have an ugly landing page on your website, would you?

3. DON’T have boring images. Part of the beauty of Pinterest’s design is that it’s almost entirely a visual experience. When creating pinnable images for your site, don’t be afraid of color, unique fonts and beautiful design. The more eye-catching the pin, the more repins it will receive.

4. DON’T only pin your own content. This is huge. DO NOT ONLY PIN YOUR OWN CONTENT. Pinterest users do not want blatant advertisements all over their Pinterest feed. So, rather than only pinning your content, pin articles related to your sector, interesting images, funny memes and mix in your products and articles.

5. DO spy on your competitors. If your competitors have a Pinterest account, go ahead and spy! Find out what they’re doing particularly well – or particularly horrible – and learn from their actions. 

6. DON’T be hard to find. It’s a good idea to keep your profile specific to your company, so anyone searching for you on Pinterest will know, at a glance, that is in fact the right profile. One great way to insure this is to have your profile verified by Pinterest.

7. DO engage influencers. Chances are you don’t have a million Pinterest followers, yet. But that doesn’t mean you don’t have fans that do! You can find and engage your most influential fans from our Fans & Influencers page. By building those relationships, you can always have a heavy hitter on your side.

8. DO use a secret board to save content for the future. When you’re on the prowl for great images to repin, don’t worry about getting your timing wrong. Just create a secret board, pin the image to that board and include the original pin’s URL in the caption so you can go back and repin it publicly later.

9. DON’T forget the “Office” board. Although users might not repin these images very often, it’s a good idea to have fun pictures from around your office. Even Pinterest has an office board! These boards help humanize your brand to fans, thereby helping to foster a deeper connection. You can even link to the board in the “About Us” portion of your website to have an easily updated place that showcases your company culture.

10. DO check for SEO value. Believe it or not, your Pinterest page can give you a serious SEO boost. Our ultimate Pinterest SEO guide can help ensure you’re getting the biggest bang-for-your-SEO-buck.


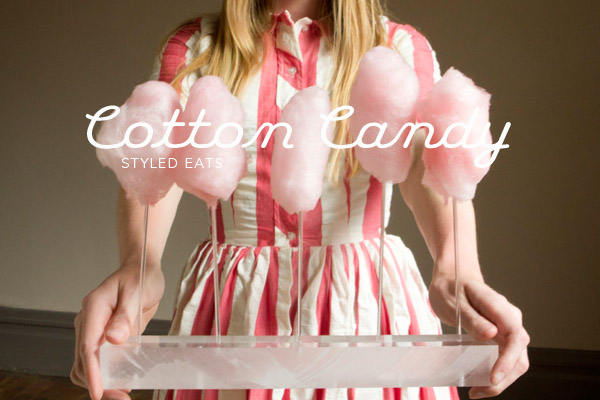
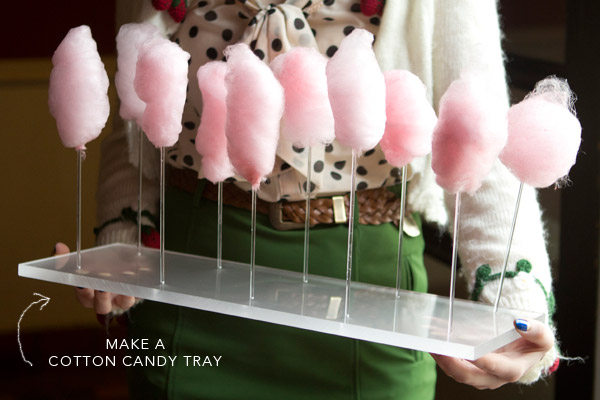
DIY ~ Styles Eats: Acrylic Trays

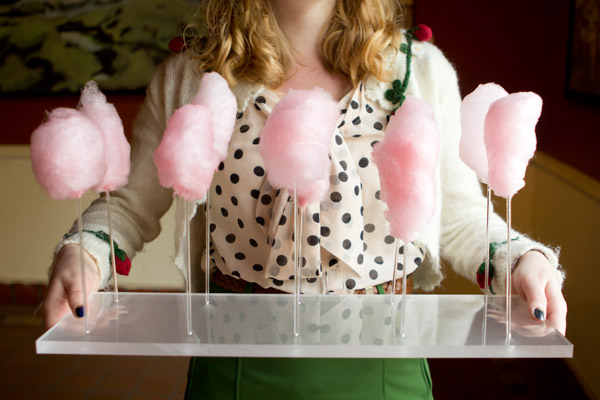
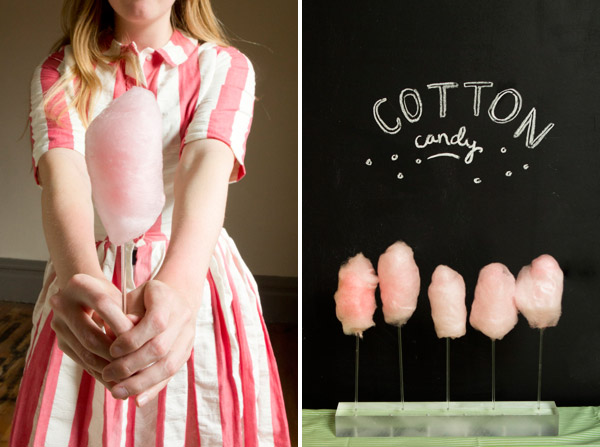
A lot of caterers use acrylic trays as a way to present food. It is a really clean and modern way to serve food to your guests. This project shows you how to make your own tray. We’ve done it here for cotton candy but you could use it for just about anything on a stick. It is really simple, all you need is to be able to drill a few holes. I think these would be great for a cocktail party or baby shower, or making an awesome Amy Atlas style dessert table. I also really like that you would be able to reuse these over and over for future parties!


Full instructions after the jump…
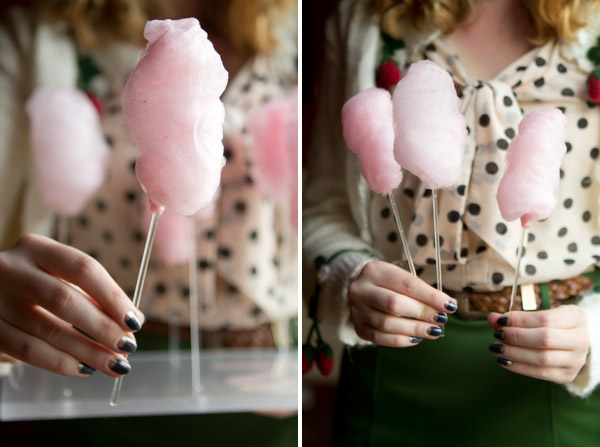
To make the cotton candy you can rent a cotton candy machine. We decided to buy one of these at-home-machines for $40. I was pretty pleased with the results. They work great for small parties but if I had to produce a lot for a school class or large group I would still rent a large machine from a party supply store. (Tip: we found we had better luck spinning the cotton candy on a wood stick rather than acrylic so we transferred them over to the acrylic sticks afterwards.)

Materials Needed: Thick acrylic slab, 1/8″ drill bit for plastic, 1/8″ acrylic sticks.

To make acrylic trays like this cost effective, the key is to hit the remnant bin at an industrial plastic store. Here in San Francisco we have TAP Plastics. They have large thick slabs in various colors and thicknesses for about $10. (If you don’t go the route of the remnant bin they can cost from $30-$50!) In addition we picked up 1/8″ thick acrylic sticks that we cut down to the size we wanted–about 7″ long. We also purchased a $5 drill bit in 1/8″ that was specifically designed to drill through plastic. All the supplies for the tray came out to about $20 and every tray after will cost about $10.


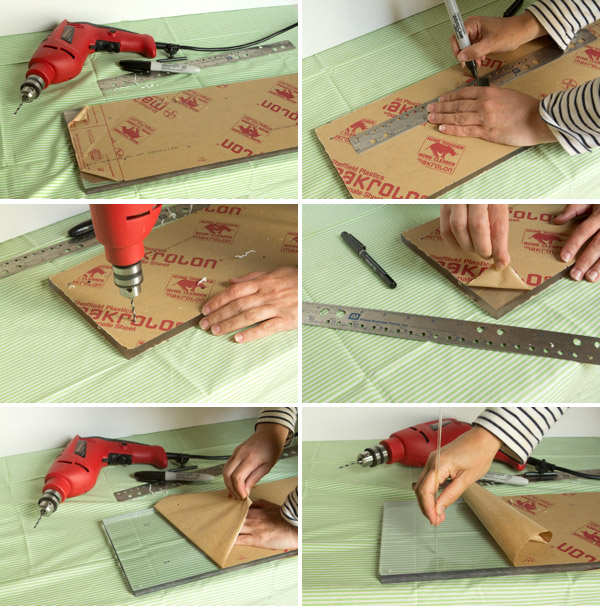
Step 1: Figure out how big you will make your cotton candy and decide how far apart you want your holes. Mark the liner on top of the slab where you are going to drill your holes.

Step 2: Using your drill bit for plastic make a hole 2/3 of the way through the slab. Check if the stick fits, if it doesn’t work the drill in the hole to widen it until it fits.

Step 3:  Peel back the liner and voila! You’ve got a tray for your party!


Wednesday, 26 February 2014

DIY: Grow an Indoor Compost Garden

Stews certainly help to take the chill out of winter. That's why we make a lot of these warm and hardy meals in our house. But it seems a shame to consign all the lovely leftover vegetable scraps—the roots, the bulbs, the carrot tops—to the compost bin. 

So, let's see how you can make your own little inside home garden:
Compost Garden, supplies, Gardenista
Above: Root vegetables such as the carrots, potatoes, and beets above lend themselves quite well to compost gardening, as do beans and bulbs like onions and garlic. You can also try citrus seeds that have been soaked in water or even pineapple (though neither of these worked for us).
Compost Garden, cutting the stems, Gardenista
Above: For leafy vegetables like carrots and beets, select specimens with the tops intact. Then solicit your little helpers to cut off all but 2 or 3 inches of stem.
Compost Garden, gravel bed, Gardenista
Above: Prepare a bed of gravel, small stones and/or soil in a shallow dish or pie plate. We chose an antique cash drawer from Oh Albatross, which we lined with plastic. You can find a similar vintage divided drawer onEtsy.
Compost Garden, planting, Gardenista
Above: For carrots and beets, push them into the gravel cut side down and add water to the top layer of rocks. Keep well watered. Plant beans a couple centimeters deep in soil and keep moist. As a bulb, garlic takes well when placed shoulder-deep in either soil or gravel.
Next, place your compost garden in a sunny spot and wait.
Compost Garden, potato sprouts, Gardenista
Above: Remember this technique with avocado pits? It works with potatoes too.
Compost Garden, sprouting carrots, Gardenista
Above: After a couple of weeks, our carrot tops are coming along nicely.
Compost Garden, bean sprouts, Gardenista
Above: Our beans began to sprout too.
Compost Garden, sprouting garlic, Gardenista
Above: Garlic greens can actually be harvested to add a bit of flavor to future soups and stews.
Compost Garden, beets, Gardenista
Above: Here come the beets.
Completed Compost Garden 2, Gardenista
Above: Here is our whole garden after about three weeks. We're going to keep it going.
Compost Garden and kids, Gardenista

Tuesday, 25 February 2014

Pricing – How to figure it out?

One of the biggest questions that comes up in the hand-made crafts selling business is “how do I price my products?”  I’m not an author yet, but I’m sure that this question also comes up there.  Well, there are several different methods that you can use to answer this question.


First of all, it’s going to depend on your purpose for selling?  Are you selling your crafts for the purpose of funding those crafts?  In which case, you simply charge for materials and shipping.  If you are wanting to actually turn a signicifcant profit, well, that takes a bit more calculation.

The easiest way to price your products is to price similarly to similar products.  This would take a bit of research (which is probably more fun than doing math).  Be specific in your research.  For example, I make crochet newborn photo props.  If I search that, I’ll get a multitude of products ranging from $3.00 all the way up to $50.00.  However, if I search Newborn Ladybug Crochet Photo, well, that limits my competition greatly and I can then decide how to price my product competitively so that I can offer a good deal but still turn a decent profit at the same time.  The key here is “competitive” not “lowest”.  Some people might aim for the lowest price and then they are not being fair to themselves and customers often equate a low price with a cheap product.

The basic formula for pricing (AHHH, here’s the math I was talking about) is (Cost of Goods + Labor) x Overhead= Price. Overhead refers to the other resources that were used during the production of your product:  Electricity, water, rent, air, etc.  Labor considers the time and energy that you put into it.


I like to use a completely different method, we’ll call it the minimum wage (again, it uses math).  Let’s say that minimum wage is $8.00,  It takes me two hours to make up a single newborn photo prop.  That’s $16.00.  Then, I add in the cost of materials (for the prop that I have in mind (the newborn turtle shell cape and hat set), that’s two skeins of yarn), which totals up to $4.66.  Roughly, it comes up to $20.00, which is what I charge for it.  Makes me feel like I’m making $10.00 an hour :-P


However you do choose to price your products, don’t cheat yourself.  You have worked hard to make your product.  I know that you want to sell it.  Selling is exiting, and gives you motivation and energy to keep going.  It’s awful tempting to price your products lower so that you can make more sells.  DON’T!  You are cheating yourself, and you are not offering a competitive market place for other crafters.  Also, as I mentioned before, cheap products are…well…cheap.  The materials are not good quality, the work you put into it may not be the best (after all, you are working for pennies, why put forth the effort?).  It just isn’t worth it.