Tuesday, 18 March 2014

WOW for MOM

Here’s a fun card for Mom at Mother’s Day. It can be made for Grandmas, or other Mother’s you think are fabulous. It’s also a great activity for students to do in class, to take home to their Moms.
Fold your paper in half. Write the word MOM at the bottom of a paper, cardstock paper would work best. Then open up the card and trace over the same “MOM” letters on the inside. It will form the word “WOW” at the top.
Mom’s won’t expect to see the trick word on the inside. When they open up the card and see the word “WOW”, they’ll feel wonderful!
I also like to spell words with the letters W O W too. Like Wise Older Woman, Wacky OriginalWatcher, Wildly Offroad Wonderer, or Wonderful Omniferous Woman (omniferous means bearing everything).


Monday, 17 March 2014

How to Share Photos on Twitter

Posting photos on Twitter allows you to share photos and other images in real-time with your Twitter friends and followers. After your photo has been published, your Twitter followers will also have the ability to retweet and share your photos with their own friends and followers. Continue reading this article to learn more about the process for sharing your photos on Twitter.

Steps

  1. Share Photos on Twitter Step 1.jpg
    1
    Log in to your Twitter account with your username and password. If you have not created a Twitter account yet, sign up.
  2. 2
    Type a new tweet into the box labeled "Compose new Tweet." This can be found on the left-hand side of the "home" screen. Alternatively you can press "n" on your keyboard to compose a new tweet.

    Share Photos on Twitter Step 2.jpg
  3. 3
    Click on the grayed-out icon that depicts a camera located below your tweet on the left. A pop-up window will display prompting you to upload a photo from your computer.

    Share Photos on Twitter Step 3.jpg
  4. Share Photos on Twitter Step 4.jpg
    4
    Navigate to the photo you want uploaded from your computer and into Twitter. The image you choose must not exceed 3 megabytes in size, and must either be in the ".gif," ".jpeg," or ".png" file formats.
    • If your photo does not meet these requirements, consider changing the file formator downsizing your photo in your favorite photo editing software.
  5. 5
    Click on your photo to select the image and have it added to your tweet. Your image will appear below your tweet in the size of a thumbnail and the camera icon will now be blue.

    Share Photos on Twitter Step 5.jpg
  6. 6
    Verify that your tweet has enough characters to accommodate the photo you added. When you add a photo, a shortened website link will appear in your tweet that your friends and followers can click on to see your photo in their browser. The website link for your photo will use a portion of the 140 characters allowed for a tweet.

    Share Photos on Twitter Step 6.jpg
    • If the character count for your tweet is below 0 after adding your photo, adjust and shorten the text you typed for your tweet so the link for your photo will fully display in your tweet.
  7. 7
    Click on the "Tweet" button to publish your photo to Twitter. Your friends and followers will now have the ability to view your photo after clicking on its link in your tweet.

    Share Photos on Twitter Step 7.jpg

Thursday, 13 March 2014

DIY : Mother's Day Mini-Book Gift Idea

This is a tutorial on how to make a mini-book for you mother, since Mother's Day is approaching, you don't want to forget her day!


I made it pocket-size, 2"x3.5" (also business card size). I made a list of 10 things (of course there are way more than 10:)) that I wanted to include in the book. I designed some cards with the numbers 1-10 on them (see below) and then went through my stash of paper, old magazines, etc. to find images/papers to cut out to also go in the book. I found images/papers that relate to memories or characteristics about my mama. For example: I found a picture of lighthouses- one of my favorite memories from my childhood was going to the beach with my family and seeing a lighthouse. I also cut out sheet music because my mama would sing to us, and some retro-kitchen-ey paper- she loves to cook (and is an amazing one at that:)), as well as some old sewing pattern paper because I remember being amazed that she could sew and mend our clothes. :) To have a few more papers mixed in with my "10 Things", I recycled some old thank you notes, writing paper, and even cut up some used security envelopes(security envelopes come in all sorts of patterns and colors!). I wanted to put these in to glue pictures to, jot extra notes or memories on, etc.
Want to make your own? Below are the cards I designed to use in the book. Simply click on the image to enlarge it, right click, save and print. The gray lines are the cutting guides, and the circle in the upper left hand corner is where you hole-punch it.

All you need is:
+ Cardstock to print the cards on
+ A hole punch
+ A binder/jump ring (available at your local craft or office supplies store) -- or your could use ribbon!
+ A pen to write with
+ Pictures

You can also use these cards for any loved one in your life- they don't necessarily have to be only for Mother's Day. :) Enjoy! :)


Wednesday, 12 March 2014

5 Ways to Use Pictures to Tell Visual Stories With Social Media

Are you sharing your stories with your fans?
Do you use pictures in your social marketing?
People want pictures in their social channels.
When done right, these pictures become visual stories.
In this article, I’ll show you how five brands are using pictures to share their stories and why that’s important.

Great Marketers Are Great Storytellers

As a marketer, you know the importance of stories, but do you know how to tell a story with few or no words at all?
“We’ve now entered a phase in which visual communication is supplanting the written word,” says Bob Lisbonne, CEO of Luminate and former SVP of Netscape.” Some are now calling it the dawn of the Imagesphere.”
Our brains process pictures 60,000 times faster than text. When your brand shares a picture, your fans decide in a split second whether they want to see more.
People upload about 250 million photographs to Facebook every day, and Twitter has become more visual, showing photos and videos right in your feed.
The growth of other image-rich sites like Pinterest has been stratospheric, and apps such as Instagram, Vine and even Snapchat aren’t just for teenagers–savvy marketers are using them too.
These channels help you tell stories that create engagement, build communities and ultimately help nurture brand loyalty and long-term relationships with customers.
Below I’ll show you how five brands are using visual stories to engage their audiences.

#1: Give Life to Your Products

Stories don’t have to be history and they don’t have to be long. In fact, quick-moving social platforms encourage using fewer words. Twitter has always limited you to 140 characters, but now you can add a picture or video to your update to reinforce your message.
Whole Foods Market used this picture on Twitter to emphasize how their products fit into customers’ lifestyles:
whole foods breakfast sandwich
Whole Foods Market connects with followers by sharing pictures of their products.
Over 3.5 million fans follow @WholeFoods, in part because the brand shares great ideas on how to maintain a healthy lifestyle.
Whole Foods’ tastebud-worthy pictures aren’t just for show; they subtly reinforce that all of the ingredients to make a delicious meal are available at their stores.
Tip: Use high-quality images or videos to give a “lifestyle” angle to your marketing.Show your customers how they can use your product in their everyday lives.

#2: Tell Your Other Story

Whether you want to share your culture, show how you design a product or celebrate some of the unsung heroes of your business, photos tell a more eloquent story than any copy ever could.
Your fans know what you look like on the outside. If you want to make a deeper connection with them, show your brand’s human side with a peek into your everyday humdrum.
Letting your fans see an alternate perspective gives them a new, more personal way to connect with your brand.
ABC World News uses Instagram to show a lighter side of the network that truly connects with its audience. Sharing informal moments makes anchors, reporters and their teams appear more relatable.
abc news instagram image
A look behind the scenes helps your brand connect on a personal level.
ABC World News shares these personal glimpses across all of their social networks, but Instagram lends itself especially well to the in-the-moment, spontaneous fun.
Tip: Don’t just take photos of perfect “on-air” moments. Give depth to your brand by showing the real work that goes into researching, designing and marketing your products. Those pictures convey your passion far better than an oh-so-perfect photo shoot.

#3: Celebrate Your Community’s Passion

Why do your customers buy your products instead of your competitors’? What is the lifestyle that goes hand-in-hand with your brand? As a marketer, you know the answers to those questions and how they define your audience.
Too many brands only use Pinterest as a way to show off their products and services. But the most successful companies on Pinterest tell the story their customers want to hear.
For example, at Random House, Inc., they know that books aren’t a product, they are a way of life for their customers. They use images to capture the entire philosophy of books, reading and literary interests.
Random House, Inc.’s 1.5 million Pinterest followers appreciate that and are eager to follow boards like What Would Jane Austen Do?Bookish Nooks and Literary Weddings.
random house pinterest image
Know your audience’s passions and give them the story they want.
Tip: Highlight the things your customers love, celebrate the communities where you live, share what causes are close to your heart and show what inspires you.

#4: Bring Your Brand to Life With Video

If you’re only using YouTube as a repository for your ‘official’ advertising, you’re missing the boat. You can do so much more with video—and give people a reason to subscribe to your channel.
Beloved tech brand Apple is a master at creating videos their fans want to watch, share and comment on.
For example, this video, which has over 3 million views, gives a tour of Apple’s new Touch ID fingerprint identity sensor—a tech development they know their fans are interested in.
)

Show off exclusive product features (and their stories) to wow your audience.
What sets Apple apart is that they don’t just show you the new feature, they show you the stories behind innovations; why they were necessary and how they make lives better. Fans identify with those stories because it’s their problems being solved.
Tip: Use videos to create a story around your product features. Share employee and customer passion to relate with your audience and let them know their interests are your driving force.

#5: Cater to an Individual Audience

Sometimes, when you try to reach everyone, you end up reaching no one. In those cases, it helps to set up channels for specific niche audiences and just tell the story that’s relevant to them.
If you’re trying to reach the elusive age 16-24 demographic, Tumblr is a perfect choice to show your visual journey, one photo at a time.
Target’s style blog on Tumblr is successful because it shares only the images that their younger, female, more fashion-conscious followers are interested in.
Under each image or set there’s a link back to the product page, which is a very clever way of selling without the hard sell.
target tumblr image
Use social platforms geared toward the community you want to reach.
TipDon’t use a one-size-fits-all story. Focus on a specific niche by telling a story relevant to them. If you’re having fun with it, they will too, and they may be more likely to buy. Don’t forget to drive traffic back to particular sections of your website.
Over to You
Social media is a gift to storytellers: You can tell a story in more interesting ways than ever before and reach a much larger audience.
Using images and video to tell your story gives a new dimension to your brand and builds closer relationships with your fans, followers and subscribers.
What do you think? How have you used pictures to tell a bigger story? How has your community responded to your visual content? Share your experiences and thoughts in the comments below.

Source.

Tuesday, 11 March 2014

Mother's Day Crafts Kids Can Make

Kids will make mom feel special with any of these creative craft ideas for Mother's Day.

Butterflies from the Sole
Mom will love seeing her child's little feet frozen in time with this cute craft. Precious footprints are transformed into a beautiful butterfly.


Mom's Memory Box
Create a box full of memories for your mother this Mother's Day. Decorate a box with photos and beads, and fill it with special family memorabilia, such as drawings, letters, and photos.


Button Picture Frame
Have fun decorating a picture frame with buttons to show off a photo of one of your mom's favorite people -- you!


Mother's Day Flower Pots
Decorate flower pots with your own special artwork. Then, fill them with seeds or a plant to show mom just how much your love grows for her.


Flutterflies
These colorful butterflies are a perfect craft project for kids who need a gift for Mother's Day. Mom will love hanging this stained-glass piece of art in her window this spring.

Monday, 10 March 2014

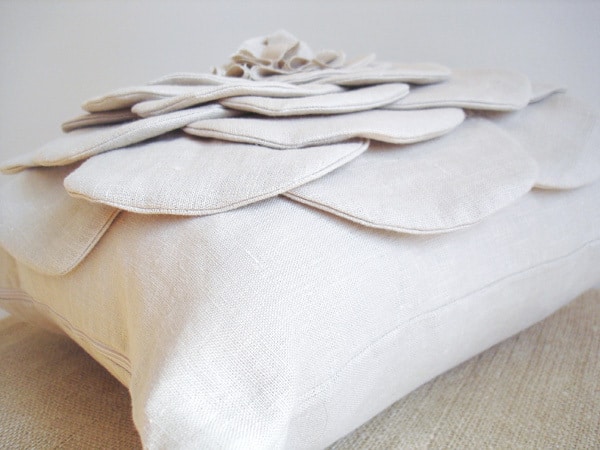
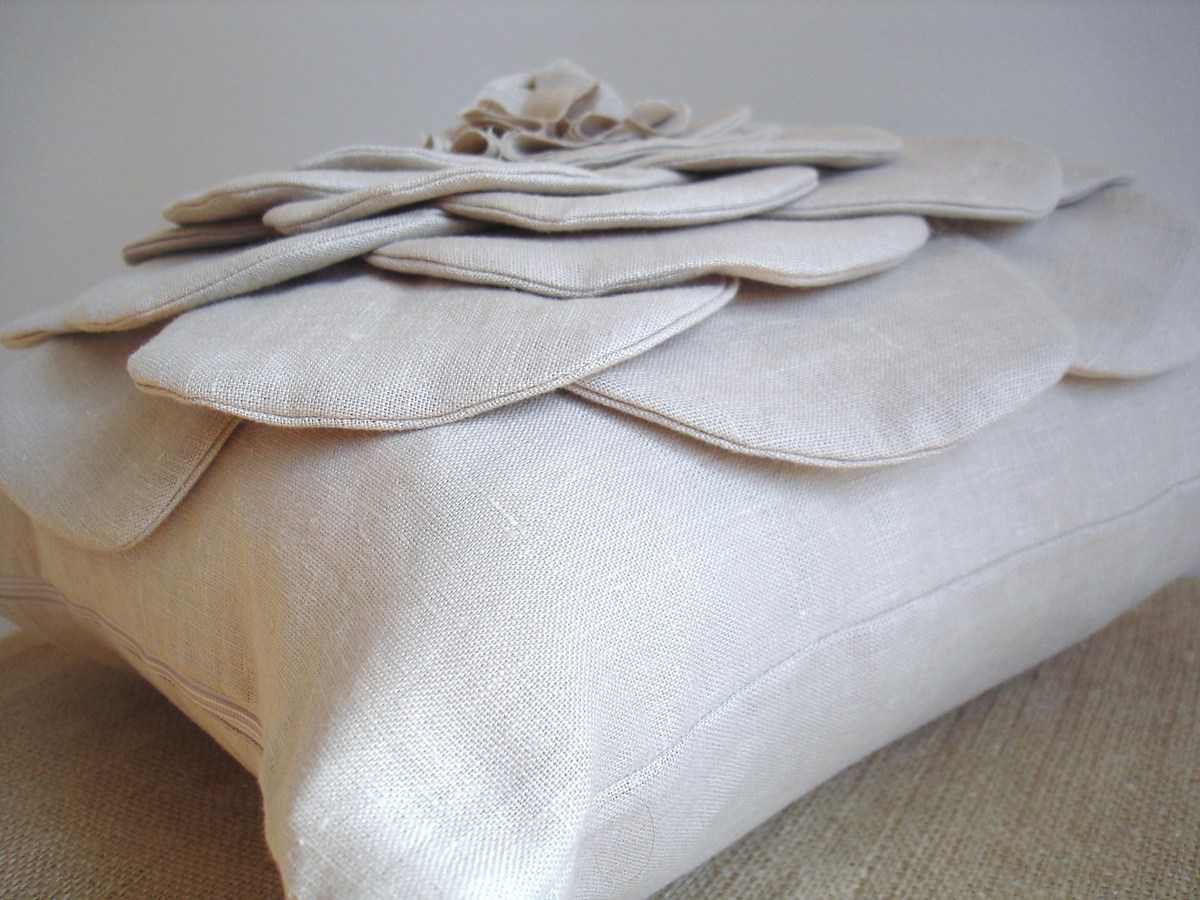
DIY ~ Flower Pillow For Mother's Day

This is truly unique and unconventional way to give flowers to your mother!

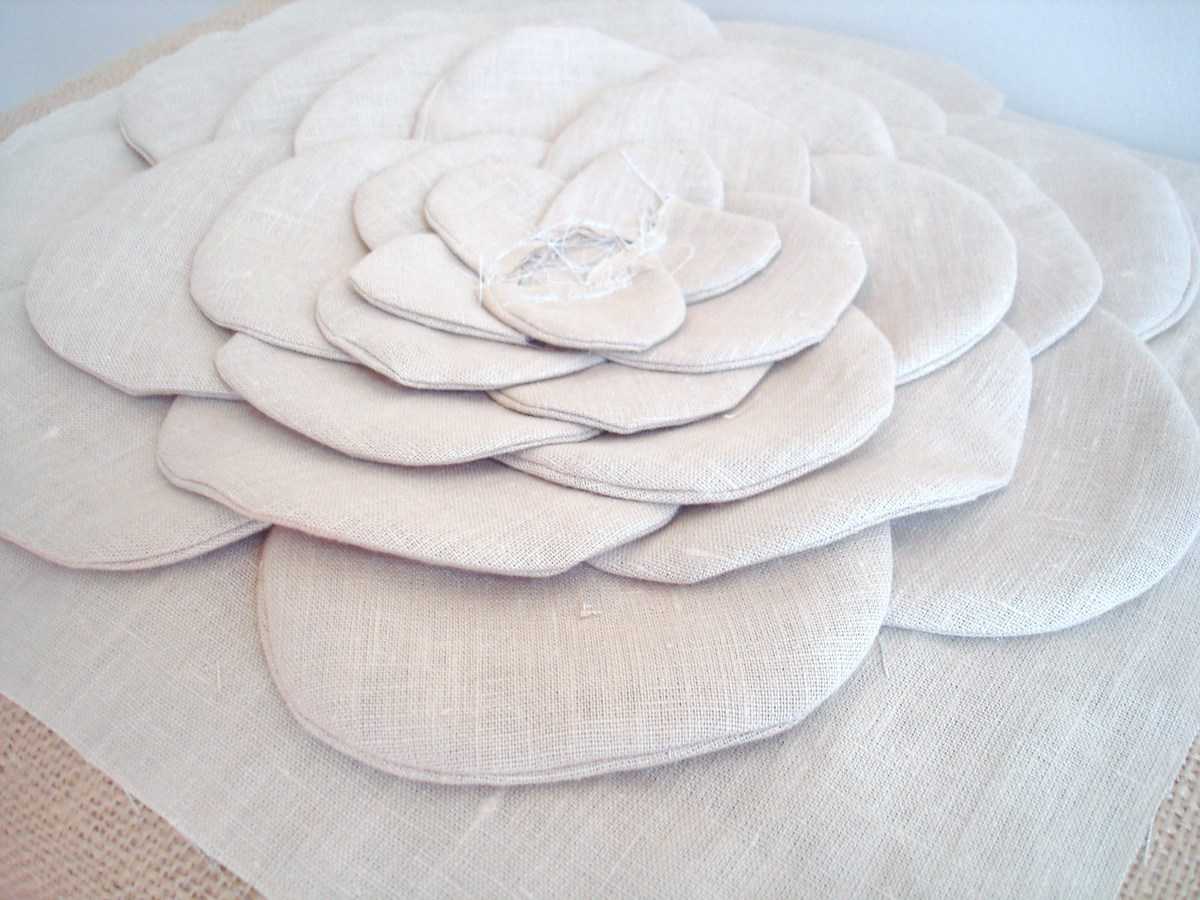
DSC020351 shabby flower pillow (a tutorial)

Supplies Needed:

fabric (linen here)
sewing machine
zipper (if desired)

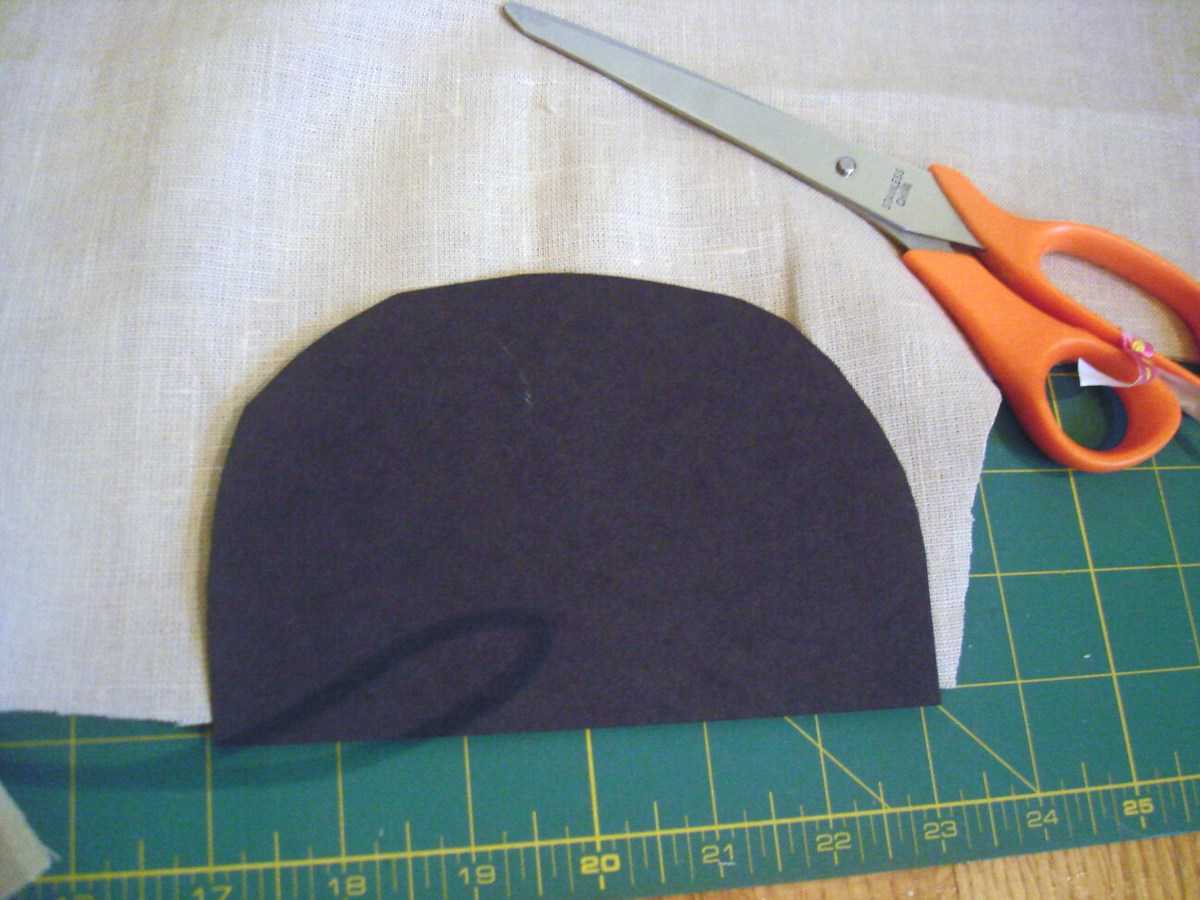
Step 1:

Create your “petals”. 
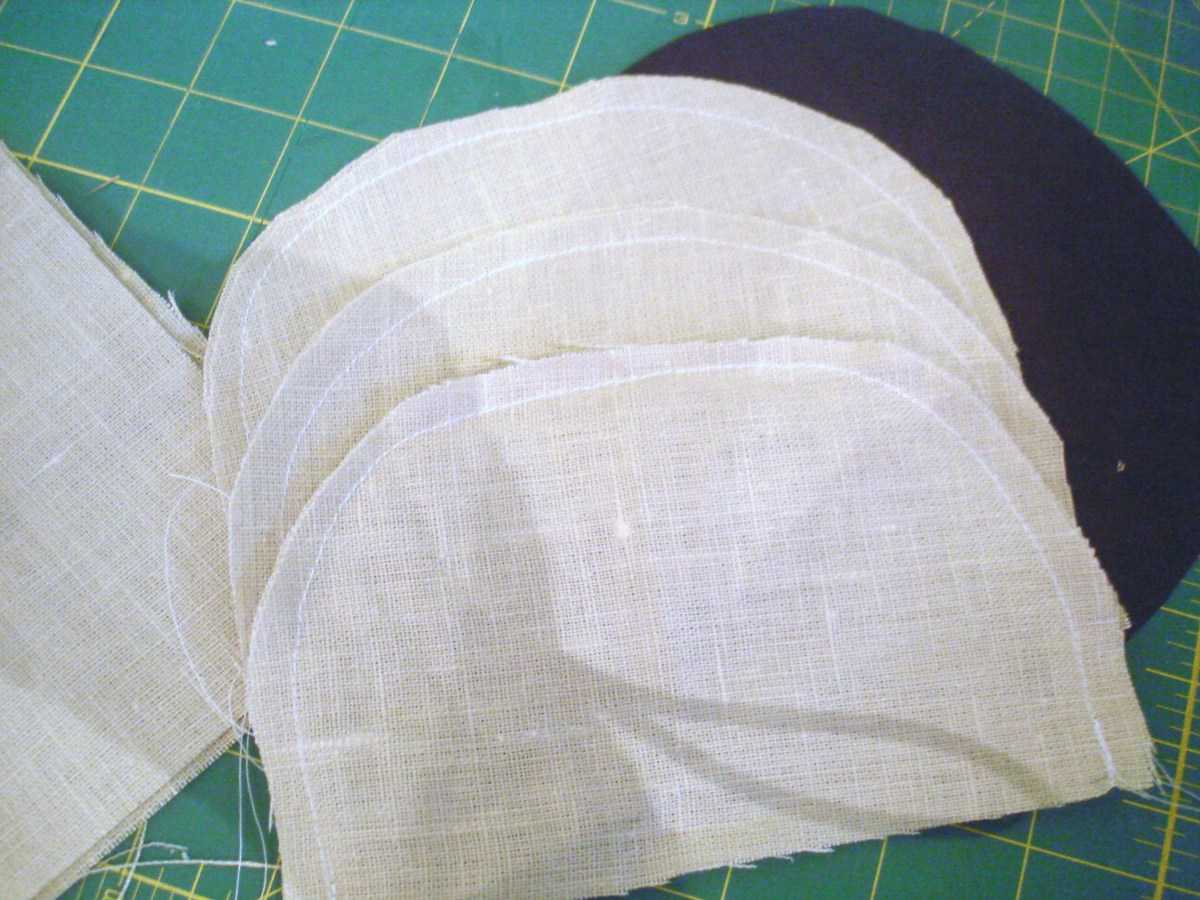
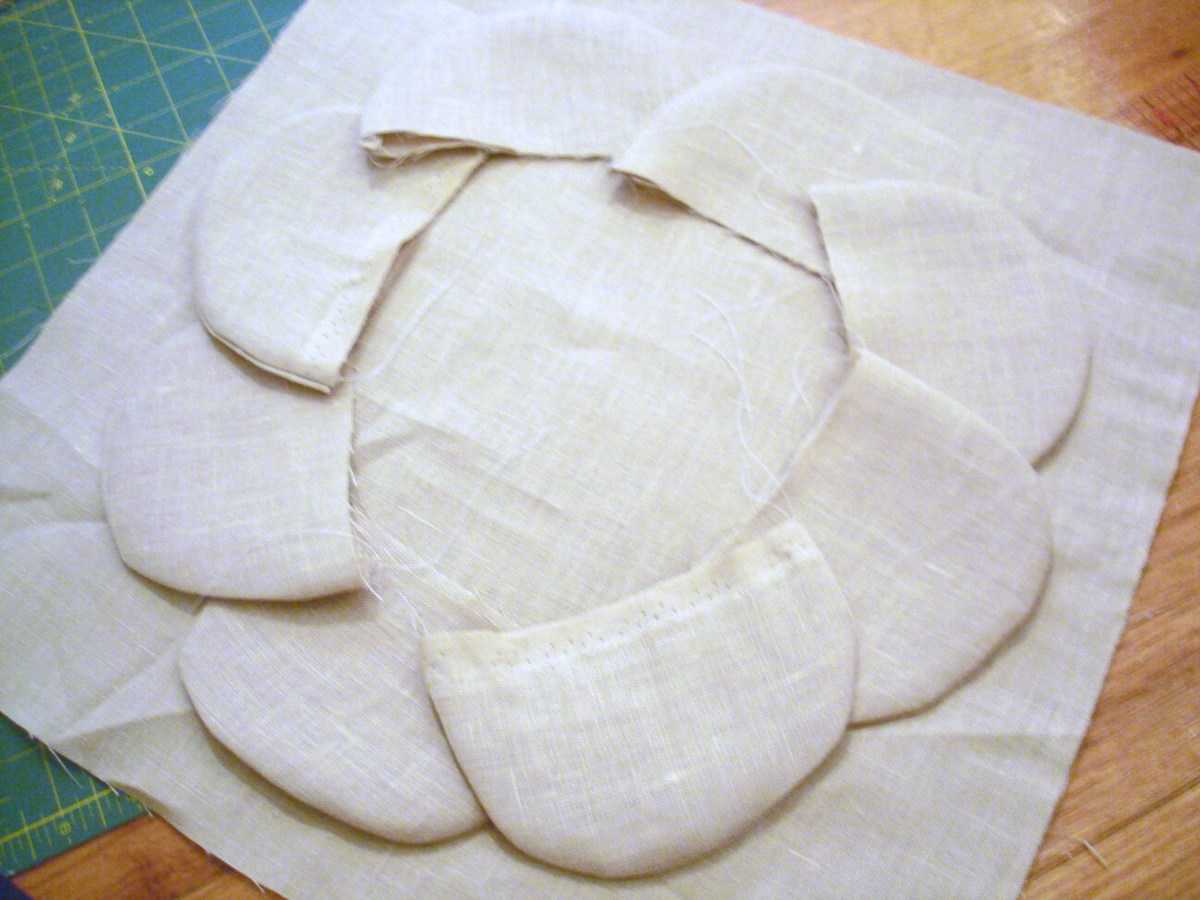
Cut out a half-circle template out of cardstock. Place on a double layer of fabric and cut. Take your two layers of fabric and stitch around the curve.

DSC01996 300x225 shabby flower pillow (a tutorial)DSC01997 300x225 shabby flower pillow (a tutorial)
Step 2: Take sew petals and turn inside out. Press flat. Take petals and arrange your first layer on your pillow fabric.
DSC02000 300x225 shabby flower pillow (a tutorial)DSC02002 300x225 shabby flower pillow (a tutorial)
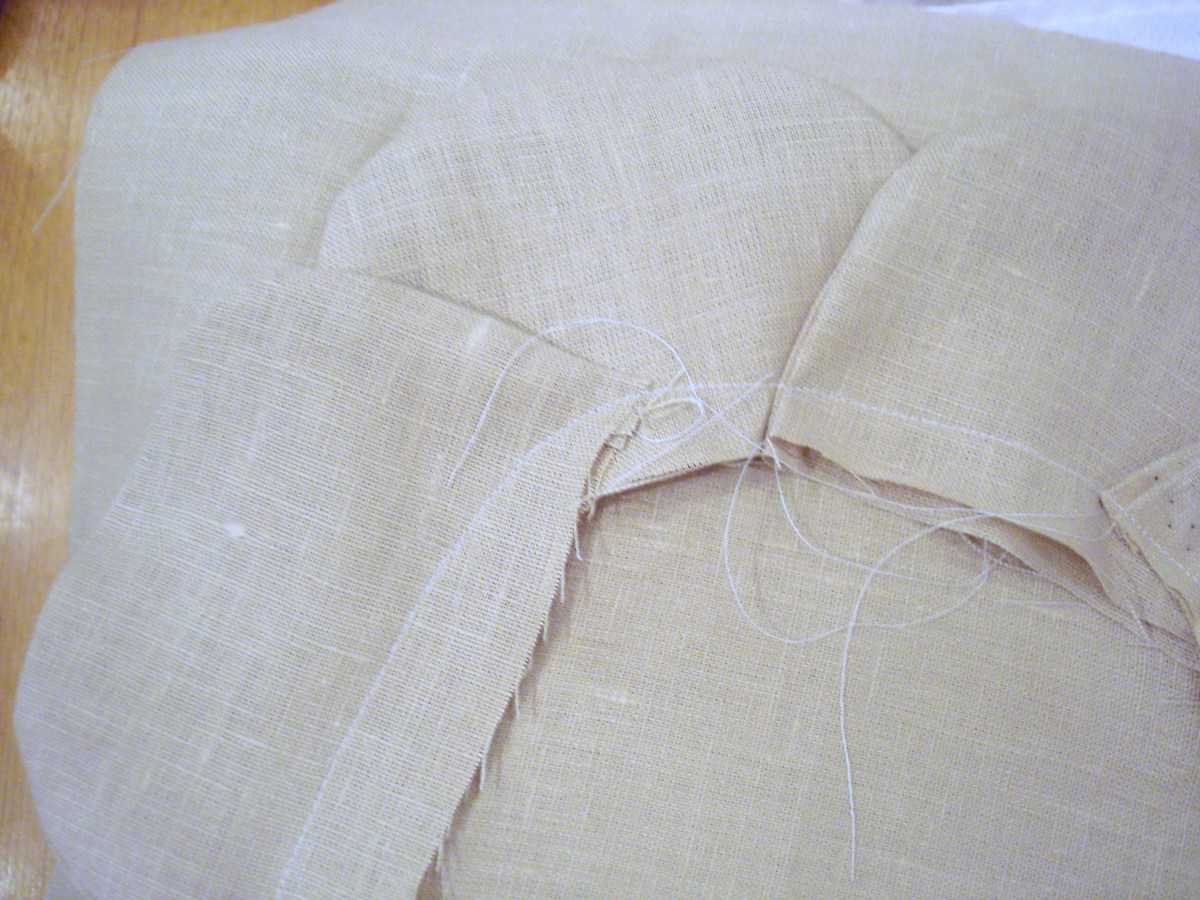
Step 3: Stitch petals down to fabric. Repeat for second layer of petals.
DSC02003 300x225 shabby flower pillow (a tutorial)DSC02004 300x225 shabby flower pillow (a tutorial)
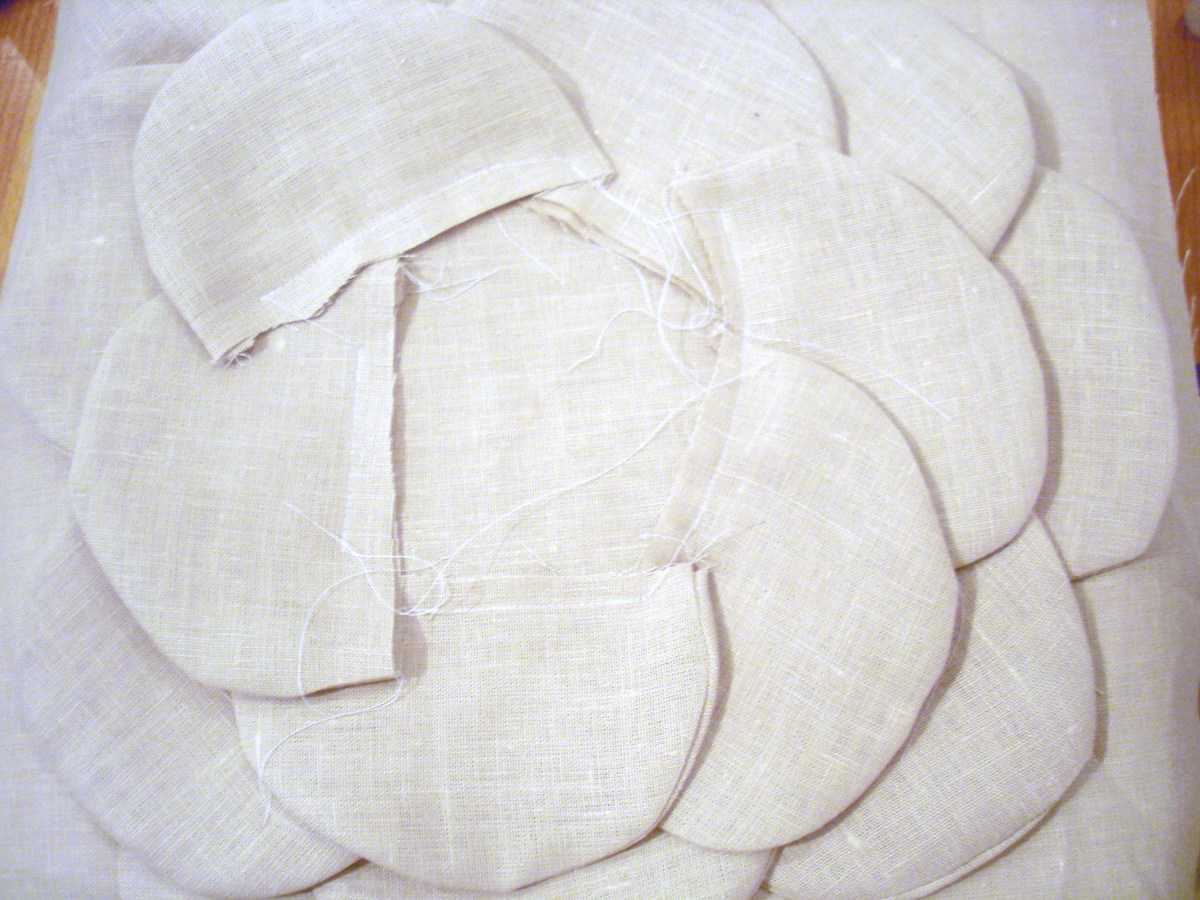
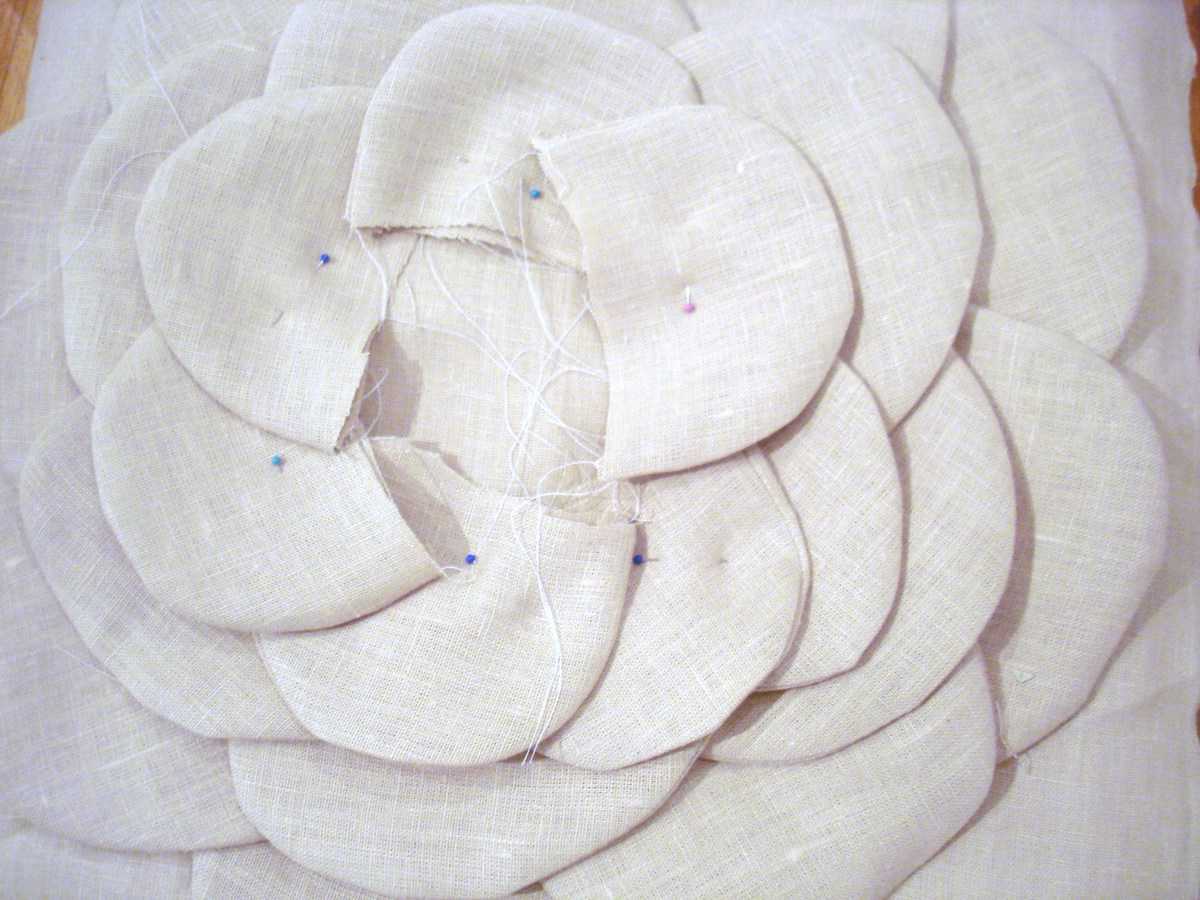
Step 4: Continue creating petals and attaching them to pillow front. Here we did 5 layers total, and, for layers 2-4, we cut down the template and made the petals slightly smaller. Then cut down the template further for the fifth and final layer.
DSC02011 300x225 shabby flower pillow (a tutorial)DSC02019 300x225 shabby flower pillow (a tutorial)
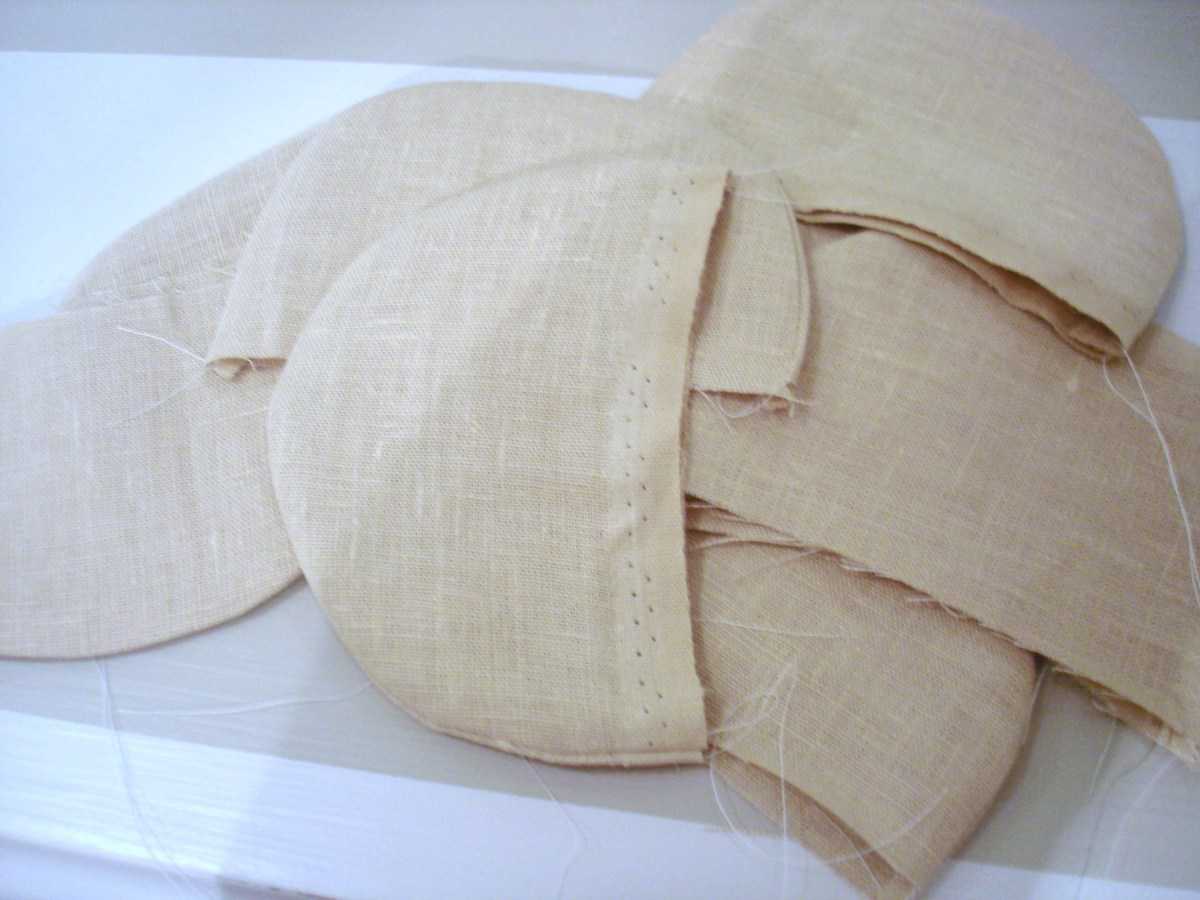
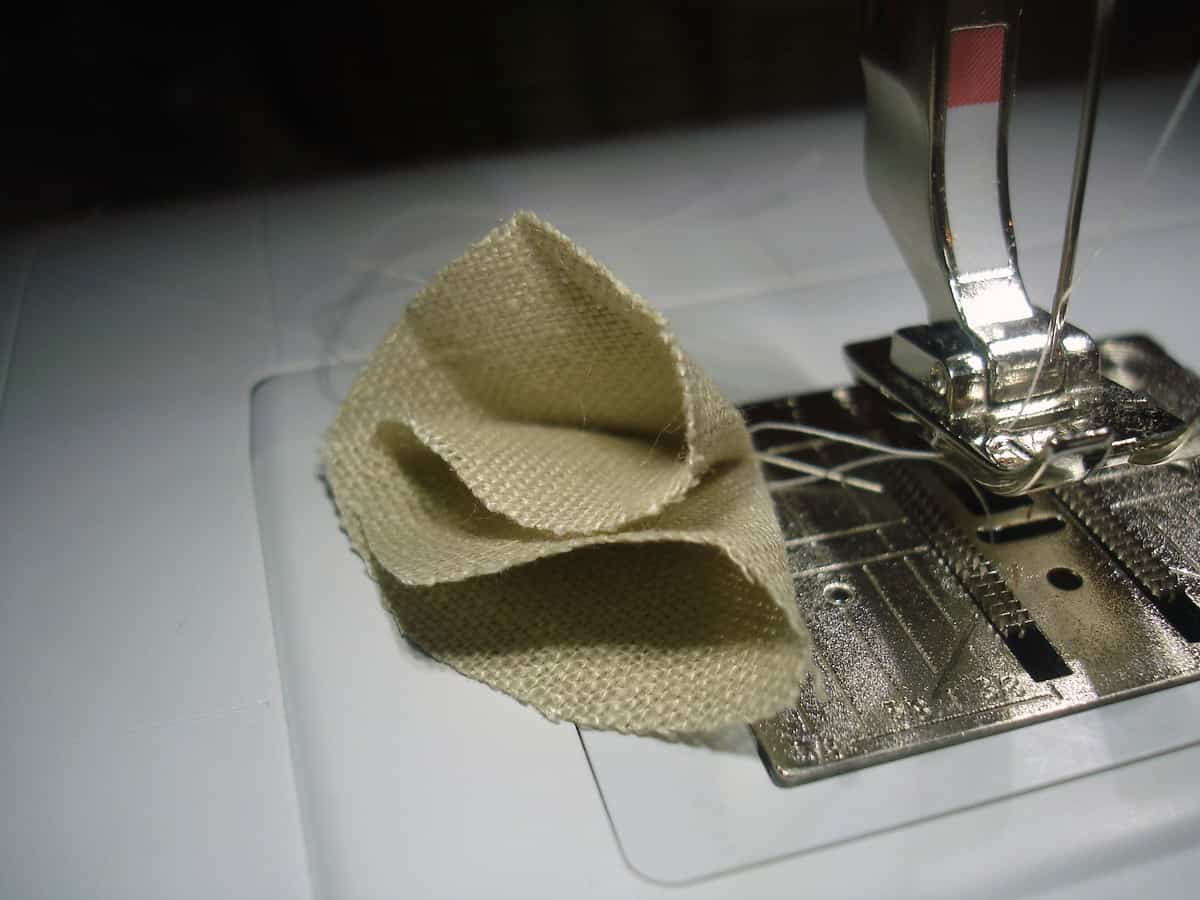
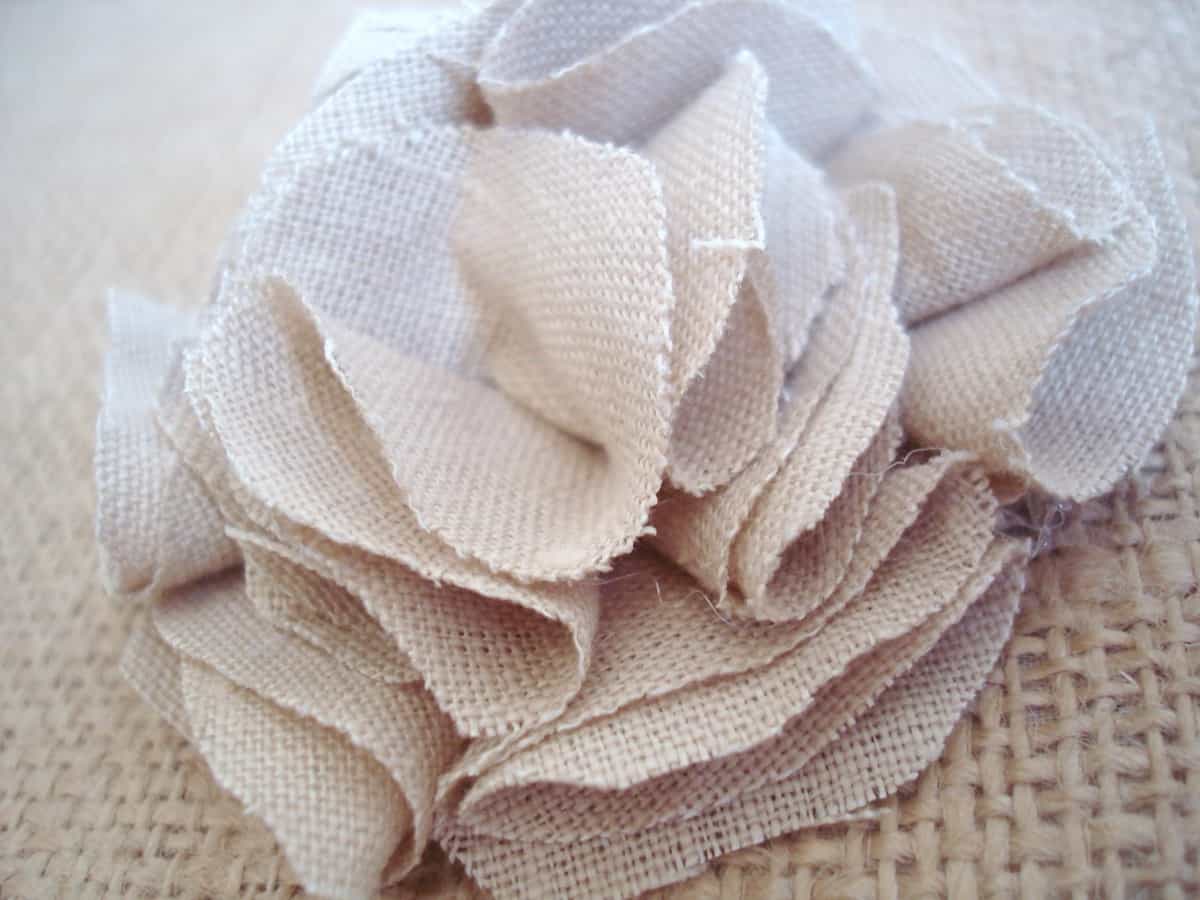
Step 5: Almost there! Now you are ready to create your flower’s center. We did this by taking small circles of fabric and folding them once (into a half circle) and again (folding them into a cone shape). Either hot glue or sew your petals shut. Take your petals and hot glue them into a circle onto a small piece of fabric. Once your outer circle is complete, continue layering and working into the center of the circle.
DSC02014 300x225 shabby flower pillow (a tutorial)DSC02020 300x225 shabby flower pillow (a tutorial)
Step 6: Glue or stitch your flower’s center onto your pillow fabric. Lastly, sew your pillow together in the method of your choice!

How to Link Facebook to Twitter

Linking your Facebook account with your Twitter account will make it even easier for you to share your thoughts with your friends and followers. If you want to know how to do it in just a few easy steps, follow these instructions.


  1. Link Facebook to Twitter Step 1.jpg
    1
    Go to this link.
  2. Link Facebook to Twitter Step 2.jpg
    2
    Click on "Link my Profile to Twitter."
  3. Link Facebook to Twitter Step 5.jpg
    3
    Click on "Authorize app." This will allow your Facebook account to post to your Twitter account.
  4. Link Facebook to Twitter Step 6.jpg
    4
    Make any necessary adjustments to your settings. You should be told that your Twitter is now linked to your Facebook profile. Right now, there will be checked boxes next to the following: status updates, photos, notes, videos, links, and events. If you'd like any of those to not be linked to your Twitter, then you can unclick them and select "Save changes."

Tuesday, 4 March 2014

How to go from Hobbyist to Professional in 9 easy steps

According to the Hobby Industry Association’s (HIA), there is at least one crafter in four out of five U.S. households, or about 70 million crafters total.  Their research says that about 14% of these 70 million crafters sell their wares, which is about 12 million people (Stats taken from A Brief History of the Crafts Industry). That is an awful lot of people who craft, and that’s just concerning the United States!  Most of these 12 million craft sellers started off as hobbyists…someone who just started crafting because they enjoyed doing it, they liked the outcome, the process calmed their spirits.  So, how did these crafters become professionals?


While they each have their own special and unique stories about how they sold their first product, the basic idea stays the same, and I want to share with you the 9 steps (in no particular order) that they each followed to go from a hobbyist to a professional.

 1. Have a craft.  Duh, right?  Well, you might think, but have you ever seen someone who has tried to sell on the idea of “I can make whatever you want”? The person who *can* make scrap book pages, but hasn’t put forth the time and effort to provide any proof of that concept.  It’s nice to offer your customers a chance to buy personalized products, to make sure that they get exactly what they want.  However, there is such a thing as offering too many options.  Letting people get an idea of the kinds of things that you can make, with examples and maybe one or two options is always the better road to travel.  As people start getting an idea of what is available as far as your personal skill-set, then they might, just maybe, possibly, start coming to you for special and unique requests.

2. Pick a niche.  While this might seem a bit of a drag to limit your crafting abilities, it really is a must for becoming a professional.  Knowing a little about a lot does not make you the expert that you need to be.  Pick one craft, maybe even one product, and eradicate every option, explore ever direction, know everything about that one thing.

3. Know your audience.  Often called the target audience, this is who you are selling to.  If you are making baby products, realize that you are selling to the parents of these babies, your audience is parents.  You have to know who you are selling to, so that you can know *how* to sell, and more importantly *what* to sell.  For instance, if your target audience is older people, you probably wont have a lot of luck selling on any online venue.  Likewise, if you are selling to high school students, I doubt you would find success with Backstreet Boys paraphernalia.  Know who you are selling to, figure out the best way to reach them, and then make sure that you are trying to sell the appropriate products.

4. Create a marketing plan.  Again, look back at who your target audience is.  Have a plan, with a set goal, on where you want your business to be in x amount of time.  Set forth a strategy to get there.  Look back every now and then to judge where you’ve come from, and re-adjust your goal as necessary.  Having a plan is definitely a must for the professional crafter.  It means that you aren’t just “look, I’m selling my hand-made crafts because I can, and if I’m still doing it in 3 months, then awesome!” Set long term, and short term goals, and re-evaluate on a regular basis.

5. Present yourself in a professional manner. Whether this is customer relations, or a public appearance, if you conduct yourself as a professional you will be treated and considered a professional.  Be polite, have manners, say yes sir, and no ma’am, no thank you, and please.  Dress the part, don’t be a slob, clean-cut, groomed, brush your teeth, and put on deodorant.  Not necessarily black-tie, but dress like you care about your appearance.  Stick with the deadlines.  Whether set by you or your customer, if *you* say a product is going to be done at a certain time, make sure that it is done!
6. Create Policies.  While not necessarily the most enjoyable part of selling crafts, it is still a must for a professional.  It is important for your customers to know how to deal with returns, or shipping issues, custom orders, or payment methods.  The hobbyist will be making up these policies on the fly, as the issues arise, oftentimes changing their ideas based on the situation.  Having a policy set in place *before* the situation is brought up by a customer and making sure that the customer knows what is going to be done about it can save a lot of hassle, and is definitely very professional and “think a headedness”  (yes, I just made that up).

7. Change your attitude.  Don’t just scratch your head and skip over this one.  You have to consider yourself and your little business a profession(al) before anyone else will. Look at it as an actual job.  Most likely, your little crafting DID start off as a hobby, something that you did in your spare time to de-stress or because you enjoyed it.  OR, maybe you are having trouble wrapping your head around the idea that you are CRAFTING as a job!  Well, you are doing just that, a *job*, and you need to look at it as such.

8. Be Competitive.  This one is all about pricing your products which is a very tricksy aspect to get right.  Don’t price your products so low that they come across as cheap quality, but don’t price them so high that you can’t effectively compete with other sellers (I can present a 93.48% guarantee that there will be other sellers of your niche).  I have been told that I price my products too low, but I *feel* like I price them too high, and I consider myself very fair.  I fit on the lower end of the average price for products of my niche and I am perfectly comfortable with that.

9. Manage your time efficiently.  You are the manager, the creator, the seller, the bookkeeper, the packager, the errand-runner, and the coffee-getter.  Maybe you didn’t want to have all of those rolls when you first signed up for this craft selling job, but the professional crafter DOES have all of those rolls.  Figure out how much of your available time can be spent on each aspect of your little business and don’t get distracted.  Remember, it is a *job*, treat it like so.

There are a ton of crafts that you can make and sell.  Do the research.  Find out what people will buy.  Sometimes you sell some items that you don’t necessarily like, but your customers do.  Take the time to figure everything out, know how you are going to sell, know who you are selling to, and know what you are going to sell to them.  Treat your crafting as an actual office-job, and be the professional that I know you can be!

Monday, 3 March 2014

How to Add Your Location on Twitter

Adding your location on Twitter will let your followers know where you're tweeting from, whether you're a homebody or permanently on the move. It's easy to do. Read on to learn how.


  1. Add Your Location on Twitter Step 1.jpg
    1
    Open your Twitter account and sign in.

  2. Add Your Location on Twitter Step 2.jpg
    2
    Look at the top right on the homescreen. You will see a toolbar with options. Select 'Settings'. Wait for the page to load completely.
  3. 3
    Navigate to "Account" tab

    Add Your Location on Twitter Step 3.jpg
  4. 4
    Tick the "add location to my tweets" box on the middle part of the screen.Save changes

    Add Your Location on Twitter Step 4.jpg