Thursday, 30 May 2013

Summer Dessert Recipe: Caramel and Vanilla Flan

This flan is of the creme caramel variety. It couldn't be easier to make. Nice sweet but light-on-the-stomach dessert.


Ingredients

Serves: 8

Caramel base:
-200g caster sugar
-3 tablespoons of water
Flan mixture:
-1 (397g) tin evaporated milk
-milk
-4 eggs
-4 teaspoons vanilla extract
-4 tablespoons caster sugar

Preparation method

Prep: 20 min | Cook: 1 hour 15 mins | Extra time: 1 hour, chilling

1. Preheat the oven to 180 C / Gas 4.
2. In a pan over a low to medium heat, mix the 200g sugar with the water. Let the sugar caramelise until it becomes a golden brown colour.
3. Pour into a flan or baking dish, ensuring it covers every part of the bottom of dish. Leave aside to cool and harden.
4. In a measuring jug, pour in the tin of evaporated milk. Add regular milk to the evaporated so that the mixture comes to 600ml (1 pint) of milk altogether. Heat the mixture in the microwave for three minutes.
5. Remove from microwave and beat in the four eggs, mix in the sugar and vanilla. Whisk well.
6. Strain it into the dish with the caramel (we strain it so that the egg bits do not go through).
7. Place the oven dish in another dish or tin filled with warm water. This is so that while the dessert cooks the caramel can melt.
8. Leave to cook in preheated oven for about 1 hour. Check with knife. The dessert shouldn't be runny, but not hard either.
9. When cooked, remove from oven and leave to cool for a bit. Then cover it with cling film or foil, and leave it to chill in fridge.
10. To serve: Once cool, run a knife round the edges and turn it over onto a tray. Slice into pieces and serve cold. The syrup may be poured over it as well when serving.

Tuesday, 28 May 2013

Coolest Father's Day: Personalised Keychain Tutorial

With Father’s Day right around the corner, We’ve been thinking about easy-to-make gifts for Dads. This one is really funny and can be personalized with photos of your family members. Using a Shrinky Dink Kit, we turned Moses and Roman into miniature pins and keychains.

Materials: 
-Shrinky Dink Kit
-Photo of Your Child
-Super Glue
-Tie Tack Backings
-Keychain Key Rings

Step 1: Size the photos on your computer.  You want it to be about 200% bigger than the size you’d like your Shrinky Dink to be.
Step 2: Print the images directly onto the plastic Shrinky Dink sheets.
Step 3: Cut out the images. Leave a little bit of paper at the top to punch a hole through for the keychains.
Step 4: Preheat your oven to 325 degrees.
Step 5: Line a baking sheet with parchment paper and lay out your Shrinky Dinks.
Step 6: Bake for 3-5 minutes.
Step 7: Let cool.
Step 8: Super glue on the tie tack backings and attach the key rings.


Not feeling crafty? Check our Father's Day Gift Guide!

Monday, 27 May 2013

4 Beautiful DIY Coasters

Whether you are a coffee drinker or a beer drinker, having a good coaster is necessary to prevent watermarks from forming on your table. How about making your own fabulous DIY drink coasters?

1. Tile Photo Coasters
Perfect for any special holiday, a set of these tile photo coasters will cost less than $5 to make. The square tiles from your local home goods store makes this DIY a unique way to showcase your favorite Hipstamatic and Instagram snaps. All you need is some Mod Podge and a bit of felt to complete this fun project. Stack and wrap the finished photo coasters with a ribbon, and you've got the perfect gift for someone special. These coasters are so cute, you'll probably end up making another set for yourself.
Read here for the directions.

2. Stamped Tile Coasters
These stamped coasters are so simple and inexpensive to make! You can grab the materials from your local home improvement store and put together a set in no time  Add some to a food or drink basket for your mom or grandmother. And make a set for yourself, too! 
Read here for the directions.

3. Bamboo Coasters
This is the easiest DIY project ever! These coasters are great for indoor as well as outdoor use. The quality of material used makes it easy to clean with just a wet wipe. With the minimum chances of getting damaged and low cost! Who won’t want to create coasters like these.
Read here for the directions.

4. Chalkboard Coasters

Chalkboard Coasters would be so cute for impromptu games of Tic Tac Toe or assigning drinks at a cocktail party! Or if you’re serving up a signature cocktail or spiked punch for an upcoming party, you could label your coasters with the name of your drink so people know what they’re enjoying. Or write little messages for guests! Really, the possibilities are kind of endless and that’s why I love them. Bonus – they are inexpensive and crazy simple to make.
Read here for the directions.

Happy Crafting :)


Friday, 24 May 2013

Twisted Headband Tutorial


Update your hairdrobe with this beautiful velvet elastic headband! It's easier than you think to create it with this great tutorial we found on ohsoprettythediaries.com .


To create this headband, here is what you need to do:
1. Gather your supplies- Velvet elastic (22 inches), Embroidery String and Baker's Twine.
2. Cut your elastic to at least 22 inches. Cut your string and twine you about 5 feet. This may seem long but you will need a lot of string. Tie a knot in the two strings and tape it to the back of the elastic. Wrap the tape all the way around the elastic.
3. Tape the group down to your table, velvet facing upward and strings underneath.
4. Cross the string over-top the elastic.
5. Cross the strings underneath the elastic.
6. Cross the strings back on top of the elastic and cross them again. After you do that twice, cross the string underneath the elastic again. Repeat steps 4-6 over and over until you reach the end of the elastic.
7. Tie a knot in the two strings at the end.
8. Take the tape off the first end of the elastic and tie the two ends off elastic together. We kept some of the elastic hanging out of the knot. Trim the elastic to be the same length and trim off any string that is hanging out of the knot.

Happy Crafting! :)

Thursday, 23 May 2013

10 Reasons to Start a Craft Blog if you Sell Online!

source: ukcraftblog.com

Are you still unsure whether to start a craft blog! You won't be after you read this!


  1. Promote your shop for free!
  2. Focus your ideas - write it down for everyone to see, this really makes you think hard about each descision.
  3. Motivation - having people eager to see what you do next helps you get on with it!  
  4. Display more detailed information, images and background for your craft work than can be displayed in an online 'market place'.
  5. Become part of a 'crafting community' - make some like minded online friends through commenting on and following each others blog posts.
  6. Feedback - recieving feedback from fellow crafters or potential customers can be enormously rewarding.
  7. Increase your confidence by writing about yourself and your crafts. The confidence you gain through blogging could be really useful in other 'real-life' situations like craft fairs.
  8. A blog  is much easier to promote than the static pages of a website as the content is dynamic and can be designed to attract a target market.
  9. Sharing your crafting skills with others through tutorials and tips can be a great way of raising your profile in the crafting community and bringing traffic to your website.
  10. Writing a craft blog is great fun, you will make new friends from all over the world and it will increase your computer literacy too!
source: ukcraftblog.com


Wednesday, 22 May 2013

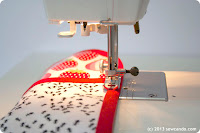
Tutorial: Super Simple Reusable Sandwich/Snack Bag

Warm weather is here & that means taking food to the park, beach, in the car and everywhere else on the go.  Why not transport it in a fun, reusable bag?  My Super Simple Reusable Sandwich Bags are a quick project made extra practical by using laminated cotton for the interior that makes them easy to wipe clean or just toss in the wash.  Perfect for sandwiches, cookies and other small snacks.  And so much cuter than a plastic baggie!

You'll Need:
- 1/2 yard cotton fabric
- 1/2 yard laminated cotton
- 1 package of double fold bias tape
- Coordinating thread
- Plastic snaps & snap pliers/press 
- Sewing notions: ruler, shears/rotary cutter, pins

Step 1:
From the cotton and laminate cut rectangular pieces that are about 15.5 inches high by 7 inches wide (this would work for most "regular" bread sizes).  Using a small dish or bowl, round off one end in a concave shape and the other end in a convex shape, so they look like this: 

Step 2:
Place fabrics together with wrong sides facing.  Encase the concave edge in bias tape and stitch together close to the folded edge of the tape.  Don't worry about folding under the edges - this will get hidden when the rest of the tape is attached.

Step 3:
Fold bag up 6 inches, as shown, so that the laminated side is facing inward and pin together.

Step 4: 
Starting at the lower left corner, fold the raw edge of the bias tape under and encase all the fabric layers in the tape, stitching close to the folded edge of the tape.  Continue all the way around the bag to the opposite corner, folding that corner under as well:

Step 5:
Now we have some perfect pouches that just need a quick closure added:

Step 6: 
For the closure I prefer to use a plastic snap.  Why?  Well, for one thing, they are super sturdy and very quick to install (I use my snap press and it takes just seconds).  Secondly, they are easy to keep clean with a quick rinse, unlike velcro & zippers that can collect crumbs.  And there's no risk of them wearing out or rusting with a lot of washing, which items like this tend to get with regular use.

Step 6a: 
Attach snap so the male half is on the center of the inner flap, about an inch from the edge. Attach other half of snap on the front of the bag, this time with the female half on the outside.

Now the sandwich bag is all set, so you can enjoy taking tasty treats wherever you go!


source: sewcando.com


Monday, 20 May 2013

Make Your Own Lip Balm


Lip balm is truly one of the easiest and most inexpensive products to create.  Once that you have created your own homemade lip balm, it is almost impossible to muster up $3.00 for a tube of inferior stuff at the store. Plus, you can even make special blends with your favorite oils, butters, and other luxurious ingredients.  You seasonal lip balms, and unique lip balms for friends and families. Lip balm may be made within 10-15 minutes, and you can easily make enough lip balm to fill 15 or more lip balm tubes for under $3.00!

Lip balm is almost fool-proof.  The great thing about lip balm is that if it turns out too soft, then you can easily re-melt it and add more beeswax, and if it is too hard, then you can re-melt it and add more carrier oil.  You really can’t mess up! You can also adjust your recipes with the seasons: harder lip balms are better for the summer, and softer lip balms are better for the fall and wintertime.  As a general rule, use 3 parts of carrier oil to 1 part of beeswax (do not include butters in your calculations as they are already solid at room temperature).  Add essential oils at your discretion, a good amount is 2 drops of essential oil per ¼ oz container, but this varies depending upon the essential oil used. Lesser is always better when it comes to essential oils, you don’t want to create anything that may sting or irritate your lips. 

Basic Lip Balm Preparation
  • Coarsely chop or grated your beeswax (vegans may use Carnauba Wax as an alternative), and place it in a small pot or glass pyrex measuring cup with your butters and carrier oils in the top of a double boiler, and melt gently over heated water.  Make sure that the water does not boil over into your oil mixture, 1 -2” of water in the bottom of your pot is enough.
  • Once that your beeswax mixture has melted, remove from burner, and add your essential oils.   The essential oils will begin to dissipate with the scent, add more as needed.
  • Immediately pour the hot mixture into lip balm containers.  If the mixture cools too rapidly while you are pouring, then heat the mixture back up over the double boiler.
  • Allow to cool completely (I usually wait overnight) before placing the caps onto your lip balm containers.
Below are some specific recipes for you to play with. Please note that these recipes are completely arbitrary, and the amount and types of oils, butter, essential oils, and other ingredients that you use is completely up to you. Experimenting with a recipe is the most enjoyable part of creation!


Lemon Coconut Lip Balm


1 Tablespoon Coconut Oil
2 Tablespoons Sunflower Oil
1 Tablespoon & 1 teaspoon Beeswax
10 drops Lemon essential oil


Peppermint Cocoa Lip Balm


1 Tablespoon Cocoa Butter
2 Tablespoons Sweet Almond Oil
1 Tablespoon Olive Oil
1 Tablespoon & 1 teaspoon Beeswax
5-10 drops Peppermint essential oil


Healing Herbal Lip Balm 

1 Tablespoon Shea Butter
2 Tablespoon Calendula Infused Olive Oil
1 Tablespoon Jojoba Oil
1 Tablespoon & 1 teaspoon Beeswax
5 drops Vitamin E Oil

All-Purpose Lip Balm

1 oz Sweet Almond or Apricot Kernel Oil
1 oz Sunflower Oil
1 oz Avocado or Olive Oil
1 oz Shea Butter
1 oz Cocoa Butter
1 ½ oz Beeswax
30-40 drops essential oil

*Essential Oil Guide*

Cinnamon: Spicy, warming. Use sparingly, as the oil is very strong.
Clove: Spicy, warming. Use sparingly, as the oil is very strong.
Ginger: Warm, spicy, and exotic. Great for winter blends. Use sparingly, as the oil is very strong.
Grapefruit: Fresh, uplifting, light citrus scent.
Lemon: Fresh, uplifting, citrus scent.
Lime: Fresh, uplifting, citrus scent.
Peppermint: Cooling, refreshing, and invigorating. Use sparingly, as the oil is very strong.
Spearmint: Cooling, refreshing, and invigorating. Use sparingly, as the oil is very strong.
Sweet Orange: Refreshing, uplifting, sweet, citrus scent. Blends well with many oils.


Friday, 17 May 2013

Tips to Grow Your MISI Shop In Spring!


I know the spring is generally considered the ‘slow time’ of year for many crafters and artisans. Craft shows aren’t as bumpin’, and it’s really hard to sell as much as you would during the holiday season when shoppers are loading up on gifts. Although this is true, I think this time of year has a lot more potential than meets the eye.

Spring is the time when cherry blossoms bloom, electric green leaves appear and everything is shiny and new. I think it’s also a time when our brains are bursting with new ideas and inspiration. It’s time to plant some biz seeds that will sprout into opportunities and success!

1. Get super clear on what you want to accomplish this year. This can be difficult because there are so many options, but take out your favorite notebook and let all your ideas flow. Pay close attention to how you feel about each of your goals. Do you feel inspired or tired? If you are not super excited about something, it’s better to just leave it on the back burner or scrap it all together. When you focus on what lights you up, it’s amazing how everything else lines up.

2. Clean up and organize your space. I know, I know…I sound like your mom, but it’s truly amazing what an organized workspace will do for your mental health! What you feel on the inside is a direct reflection of what you see on the outside so you want to make sure your studio or workspace gives you the creative energy you need as an artist. Make it a gorgeous space that inspires you and makes you feel good inside. If you are not naturally a gifted organizer, perhaps you could enlist the help of a friend who is. Bribe them with wine and sparkling conversation because who can say no to that?!

3. Re-connect with your customers. When you are so busy trying to do a million things, it’s easy to neglect your customers. This is not good, because without these lovely people, you don’t really have a business. Customers love to be acknowledged and appreciated so reach out and connect with them. Tell them what you’ve been up to and what you have going on in the next little while. If it makes sense, offer them a coupon that they can use online or at the next craft show you will be at. They want to hear from you! Also make a point of chatting up your regular customers at craft shows. Typically spring shows are less congested with shoppers so you have more of an opportunity to have a conversation. Ask them about their experience using your product and if they have any feedback. This information is gold so make sure you quickly write it down.

4. You know all the stuff you have been putting off for the past 6 months…DO IT! Again, sounding a bit like your mama, but you will feel amazing and your business will flourish. If you are not clear what you have been putting off, take a mental time machine back 5 months ago. Did you wish you have new signage, better hangtags, an opt-in on your website, sexy business cards, gorgeous product photos?? Yep, you know what I’m talking about! When we are busy it is so easy to put things off until ‘someday.’ To be a successful creative entrepreneur you have to get in the habit of doing. It’s one thing to have the best intentions and ideas (most of us do) but to really step up your game, do what you say you are going to do. You won’t believe the difference this will make on your business and your life.

Read more at designsponge.com

Thursday, 16 May 2013

Photo Taking Tips For Your MISI Shop


Great photography is a necessity when you have a handmade jewellery website. Unfortunately, handcrafted jewelry is very difficult to photograph. Many jewelry artisans cannot afford to go to a professional and so they want to do it themselves. There are some simple techniques that even amateur photographers can use to obtain better results with minimal effort. The following suggestions should allow anyone to achieve results they can be proud of.

1. Improve Sharpness

The macro lens is a big help for the sharpness factor. Another key to a sharp image is a tripod. It is absolutely essential to use a tripod or similar camera support when taking pictures of handcrafted jewelry. A sturdy tripod is better than a flimsy one, but any tripod is many times better than no tripod. Always use a tripod and your photos will be sharp.


2. Get Lighting Right

Normally diffuse lighting works best for jewelry so that there is no glare. We cannot sit around waiting for the perfect slightly cloudy day to take pictures of new handcrafted jewelry designs. You have probably already discovered that an on-camera flash does not lead to good photos. Not only is the flash too bright at such a close distance, it will also create bright spots and distracting shadows. Rather than flash it is better to use continuous lighting for photographing handmade earrings and handmade bracelets. Using daylight balanced bulbs for lighting provide natural-colored light. You can purchase these from photography suppliers. We use 5200 K bulbs which resembles daylight most closely. Even these lights will need to be diffused and for that use a light tent as the diffuser.


A small light tent makes it easy to reduce glare and control shadows for handcrafted jewelry photography. These are commercially available in a wide range of sizes and shapes, but are generally quite expensive. It is not difficult to make your own lighting tent from white rip-stop nylon material, a couple of metal coat hangers and double-sided tape. The light tent tends to soften the shadows and eliminate glare, while providing a clean and clutter free background. We place the tent on a glass table and have a light under the table to reduce shadows.

3. Find the Perfect Exposure

Proper exposure is the last key to good handmade jewelry photography. If your background is actually white but appears gray in your image then the image has been underexposed. This means you need to let more light get to your camera’s image sensor. Adjust your camera exposure compensation setting to slightly overexpose the image. Nearly every digital camera has an exposure compensation setting, but you may need to read your camera user manual to find how to adjust yours. Once you locate the controls for exposure compensation simply increase the exposure until the image looks correct. We adjust the white balance so that the background shows white and this dramatically affects the crispness of the colors.


Wednesday, 15 May 2013

4 Ways With Doll Pegs

Add a little girly charm to your big day décor with these 4 easy and lovely ideas :

1. It's got your name on it
Paint your peg with acrylic paint to match your colour scheme, then write your guest’s name on using a thin marker pen. If you’re feeling even more creative, play around with colour combinations or write just their initials for a quirky take on place cards. 

 2. The bride & groom
For the groom: use a black marker pen to colour the bottom half of the peg, to make trousers, then add a strip of ribbon for the waist and stick on a small bow for the bow tie.

For the bride: cut a triangular shape of material, wrap around the peg and secure with glue. Add ribbon for a sash and bow. Use your marker pen to dot the eyes.

3. Message to you
Paint your pegs in colours and patterns to suit your theme – polka-dots and painted dolls look super cute for a kitsch, retro do. For the dolls; paint in the blouse and collar shape then use a marker pen for the buttons bow tie, hair and eyes.

4. Gifts for girls
Stick Washi tape around the top half of the peg for the blouse, and wrap folded crêpe paper around the bottom half to create the skirt, before gluing in place. Add a small bow to the front. For the wings, curl a pipe cleaner into a figure of eight, twist in the middle and glue into place.

Tuesday, 14 May 2013

5 Everyday Uses Of Nail Polish

Everywhere we look, it seems like a new nail art trend pops up. But aside from creating beautiful manicures, did you know that polishes can be used for a bunch of other non-nail tasks too? Here are five unexpected (and super handy!) ways to use them in your everyday life: 


1.) Organize your keys: For those of you with a jumble of keys on your keychain, this is an easy trick to help you distinguish which key goes where. Unhook the keys from your keychain and paint the tops of them different nail polish shades. For example, pink can be to your house, purple to your work, etc. You can even get more creative with patterns or use glitter – just coat one side of the key with glue, sprinkle with glitter, then let dry and seal off with a coat of clear nail polish! Or just use glitter polish :)

2.) Smooth over splinters: I think we can all agree that splinters are the worst – they’re painful, hard to get out, and can even snag your clothes. An easy solution is to just paint over any rough edges in your furniture or wooden hangers with a dab of clear nail polish. It will smooth over the splinters and prevent your clothes – and you – from getting pricked.

3.) Prevent tarnishing: As much as I love fun costume jewelry, a lot of it ends up tarnishing after only a few uses. I learned this trick from a friend, and now I do it with all of my cheaper jewelry! Just paint a clear coat of nail polish inside your ring or the back of your earring and voila – no tarnishing or leftover green tint on your skin!

4.) Stop runs in your tights: The dreaded jagged line in your tights might feel unavoidable, but you can stop runs in their tracks just by using clear nail polish. The next time you see a tear start forming, grab a bottle of polish and dab some over the torn area – it will prevent the tear from getting bigger, and if you’re lucky, you’ll catch it early and your tights will be saved! This also works for any clothes that you have that have started fraying.

5.) Seal envelopes: Save yourself from having to lick the icky glue most envelopes come with and seal with a thin line of clear polish instead! This is especially helpful when you are sending invitations, which require you to send and seal a bunch of envelopes in one sitting. 

Have you ever tried any of these tricks? What are some other ways you like to use nail polish around the house? Share your tips with me below!

Monday, 13 May 2013

How To Recycle All The Things


Below are some of the more perplexing Can-I-Recycle-This? items with tips for safely recycling them.

Plastic Bags — When you go grocery shopping, it’s generally considered eco-conscious to bring your own tote bags. However, there are times when you don’t have your own bags on hand. What, then, can you do about those pesky plastic supermarket bags, aside from using them for garbage and dog poo? You can recycle them! Some municipalities accept plastic bags (and other plastic-bag-like materials like plastic packaging and produce bags) in curbside pickup, but if yours does not, you need only venture as far as your local supermarket or pharmacy for a drop-off center!

Electronics — You know the situation: You’re cleaning out your closet and you find all manner of tangled cords with nary a matching device in sight! What on earth do you do with all of these defunct chargers and connector cables? Instead of simply tossing them into the trash, you should know that these, along with most other electronic objects, can indeed be recycled! Many municipalities, New York City included, will collect most electronics (even large televisions and computer monitors) after making a pick-up appointment. In fact, after 2015, New Yorkers will be required by law to recycle such objects. Be sure to check your local municipality’s website to see if they have a similar program. On the off chance that they do not, fear not! There are many stores that offer electronics recycling free of charge! Office Depot, for instance, will accept any electronics that fit within their recycling boxes. If you’re an Apple-phile, you can rest assured knowing that all of your Apple products can be dropped off or mailed to any Apple store for recycling— they’ll even give you an Apple gift card in return! Best Buy will also take your electronics off your hands, even if you didn’t purchase them there! Perfect for those obsolete cellphones, chargers, CD players, etc!

Clothing and Shoes — If you’ve simply outgrown or gotten tired of your clothes and shoes, the logical thing to do is donate them to a thrift store. What, though, do you do with fashions and footwear that have become too worn out to be useful? It turns out that you can still drop them off to those very same places. Both the Goodwill and Salvation Army have programs that will accept unusable clothing and textiles and recycle them into things like mattress filling and carpet underlay. If you have worn out denim, the company Cotton From Blue To Green, will take it off your hands and turn it into insulation. If you have old sneakers that can’t be repaired, Nike offers a program that turns old sneakers into track flooring.

Packaging Supplies — If you work in a busy office, it’s likely that you receive a lot of packages and, subsequently, scores of mismatched packaging supplies. Common sense tells you that simply throwing out styrofoam packing peanuts, cardboard boxes, and bubble wrap is a bad thing, so what to do with those pesky things? As it turns out, you can recycle these items at the same place you picked them up from! Participating UPS Stores will accept your used packaging supplies. You can also check out The Plastic Used Fill Council for more local drop-off sites.

Food — That’s right, you can even recycle food. Some municipalities (like Seattle, Portland, and San Francisco) already have curbside recycling programs in place that will collect your compostable food scraps. If your city is still waiting for such programs, however, you might be able to donate your food scraps elsewhere! Many local farmer’s markets, for instance, have drop-off centers for compostable food and household waste. Make sure to check with your local market first!

Everything Else — Whether it’s used house paint, an unfixable air conditioner, car tires, or old furniture, chances are that you can, in fact, recycle it! Although most municipalities will not accept such items through their regular curbside pickup, many have regional drop-off centers that will accept just about any sort of household waste for recycling. Check your local municipality’s website for information about local drop-off centers and what kinds of objects can be recycled. You’ll probably be surprised at just how much can actually be saved from the garbage dump!


Thursday, 9 May 2013

4 Lovely DIY Camera Straps Projects


1. Leather and Chain Link Camera Strap

Supplies:
-Purse strap with attached snap hoop
-Jump rings
-Cable-Ink chain
-Swivel lobster clasp

Step 1: Cut two 9-inch lengths of cable-link chain with jewelry wire cutters.

Step 2: Using pliers, link two 8-millimeter jump rings, then attach one of them to an end of one chain. Repeat with two more jump rings at the other end of the chain.

Step 3: Repeat Step 2 with four more jump rings and the second chain.

Step 4: Snap open the hoops at either end of the purse strap. Attach a chain to each hoop by sliding one of the chain's outermost jump rings onto the hoop. Snap both hoops closed.

Step 5: Using pliers, connect a 32-millimeter swivel lobster clasp to the jump ring at the end of each chain. Finally, fasten those clasps to your camera and start clicking.


2. Toy Camera Strap


Supplies: 
- Needle nose pliers
- Clasps
- Copper wire
- Safety pin
- Leather cord

Step 1: Cut cord into 3 pieces, attach one end with safety pin to something stable (I used an armchair) & braid until desired length. I made mine 35 inches.

Step 2: Slip ends through clasp.

Step 3: Fold over & wrap excess with copper jewelry wire. I used the pliers to clamp ends down (so I don't get poked) & I trimmed the excess leather.

Step 4: TA-DA!!! Now you have a super simple cute camera strap!


3. Chain Camera Strap

Supplies:
- 2 m of strong but lightweight bronze chain
- 2 sliplock buckles
- 50cm of strong nylon webbing
- E6000 glue
- Scissors

Step 1: Cut the nylon webbing in half.

Step 2: Slide one end of the nylon webbing through the camera strap holder on the camera.

Step 3: On the outer lower half of the nylon webbing, thread one of the sliplock buckles.

Step 4: Fold the chain in half and slide the two loose ends onto the nylon webbing.

Step 5: Double the nylon webbing over and pass back through the sliplock buckle.

Step 6: Thread the other loose end through the sliplock buckle and reinforce both ends with E6000 glue.

Step 7: Press down to dry and feel free to reinforce the glue with some hand stitches through the webbing. Finally, repeat this process for the other end of the strap.


4. 70's Style Camera Strap

Supplies:
- 2 yds cotton webbing
- Masking tape
- Acrylic craft paint
- 2 swivel hooks
- Fabric glue
- Needle and thread
- Metallic leather or vinyl (optional)

Step 1: Measure out the desired length of your strap and add 2 inches.

Step 2: On a work surface use tape to create a geometric design taking care to make sure tape is fully adhered to the webbing. We used the rounded side of a bone folder to smooth the edges on the tape to be sure our paint line were crisp.

Step 3: Now the fun part, apply paint to webbing. Be sure paint is dry before attempting to remove tape. Watching paint dry is a skill that takes practice.

Step 4: Now that your strap is looking amazing, slide the ends through the swivel hook giving yourself about an inch of strapping on the reverse side and glue. Be sure to give the hook a little bit of space to move when gluing.

Step 5: Because you’re hanging your beloved camera around your neck add a few stitches to the glued area for good measure!


Wednesday, 8 May 2013

How to Organize Your Craft Room

It's time to get those craft supplies organized, ladies! If that seems like an insurmountable and extremely expensive task, just check out these easy tips for getting it all together in a creative way that's sure to appeal to the crafty gal.

 
1. Get it together

First things first — before you can organize the supplies, you need to organize and sort them. While you're sorting, toss anything you know you won't need. Once you have everything sorted into different categories, you'll have a better idea of what solution you need. Remember, your stash of supplies will likely grow, so make sure you have enough storage space to accommodate your growing collection.


2. Use rods for rolls

Every crafter has a variety of ribbon, paper and other supplies that come on rolls. To keep it in good condition and easy to access, install rods to hang them on. You can use store-bought rods with rubber stoppers in a craft closet or insert dowel rods purchased at a hardware store in a row in a laundry basket by running the rods through parallel holes. Just make sure the rods are at least somewhat easy to remove so you can add new rolls and take off empty ones.


3. Repurpose old glass jars

For things like buttons and beads, a lot of crafters use the same toolkits carpenters and contractors use to store screws, nuts and bolts. That's a great idea, but it's not the only way (and let's face it, those little plastic kits aren't really that cute).
Instead, you can mount the lids of old clear jars of various sizes to the bottom of a cabinet or shelf using flat-head nails or screws (make sure the nail or screw isn't so long that it goes through the top of the shelf. Then just put all your supplies in the jar and screw it into the lid, where it will stay suspended and make it easy to see what's in each jar.

Extra small items like eyelets can easily be stored in little pillboxes (you know, the kind that show the days of the week?). Just use tiny labels for each individual container or glue one of the items in that container to the outside so you can easily identify which supplies are where.


4. Tins or pails for longer items

If you need a place to store pens, scissors, craft knives and other longer items, store them in a series of vintage pails or save old coffee or chip tins and wrap them with beautiful contact paper. The pails can also be hung from hooks placed on the bottom of shelves or cabinets. Alternatively, use a wine rack with clear tubing.


5. Think outside the craft store
Desktop stadium-style organizers are perfect for small scrapbooking decals, stickers and similar supplies and the tiered levels make it easy to see everything you have at a glance. Those plastic sleeves for photos or trading cards also work well for this purpose and can be stored in a binder with index dividers for labeling and categorizing.

Desk drawer organizers, accordion files, file carts and more can be used for a variety of purposes. But it doesn't stop at the office. Shower caddies, glassware and bowls, closet organizers and more can be repurposed for your craft supplies.

Don't be afraid to hang things in unusual places, either. A canvas shoe organizer can be hung on a curtain rod to do double-duty as an organizer and curtains. The possibilities are endless.

source: sheknows.com